Review Requests to Join Your Lyris E-list
This article applies to: E-lists (Lyris)
One of the ways you can configure your Lyris-based list determines who is allowed to join. There are three options:
- open - anyone can join (no approval needed).
- private - administrator must approve new members.
- closed - only an administrator can add new members. (See our List Configuration: Who Can Join page for details on these options.)
If your list is set to either open or closed, the information on this page is not relevant for that list.
If you chose private, people who want to join your list can still send the “join” command (see our Join a List article for details), but they won’t start receiving postings from the list until an administrator approves their request to join. (You can also decide to reject their request. We’ll cover that, too.)
Respond Via Email Commands
This is a rare instance where using email commands sent to Lyris actually works better than using the administrative web interface.
When someone tries to join a private list, the list administrators will receive a notification email that includes the commands the admin should use to accept or reject the request. 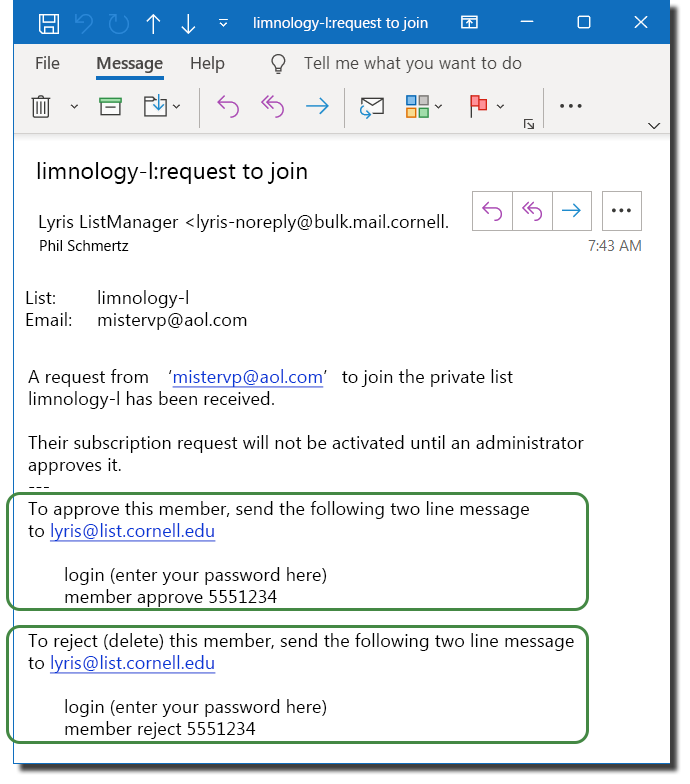
As shown, to accept or reject the request, you must send a two-line message addressed to lyris@list.cornell.edu.
Leave the subject line blank. The body of your message will use this syntax:
login password
member approve thenumbers
where
- password is the password you use to administer this e-list.
- thenumbers is the number shown in the message you got from Lyris. (In the example above, the number is 5551234.)
If you want to reject the request, replace the word “approve” with “reject” in the second line.
Please note that the message you send must come from the email address you use as a Lyris list administrator and must be plain text.
The first line lets Lyris know who you are. Include your password after the word “login” and a space. No parentheses or quotation marks. (What if I’ve forgotten my Lyris password?)
The second line tells Lyris whether you want to accept or reject the request. The number on the second line will be different every time you get one of these messages, so either cut and paste, or type the number carefully.
Some of you are probably asking yourselves, “If I don’t want to approve a request, why don’t I just ignore it?” Well, you can, but the name of the person will clutter up your membership list with a status of “private,” so it’s much neater to do things as described here.
And, in case you were wondering why it’s better to use email (instead of the web interface), when you accept a request via email, Lyris will automatically contact the new member to tell them that their request has been approved. When you use the web interface, the requester still becomes a member, but they don’t get the welcome message.
Respond Via Lyris Web Interface
This is a rare instance where using email commands sent to Lyris actually works better than using the administrative web interface. So, we suggest you use the procedure above. But some people prefer using the web interface, so here’s how to do that.
- Log in to the Lyris administrator web interface.
- How do I log in?
- Take me to the login page. - Click .
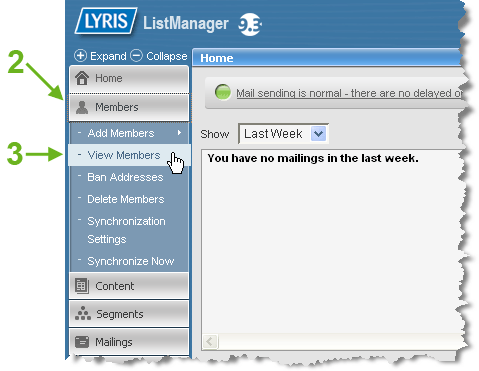
- Click .
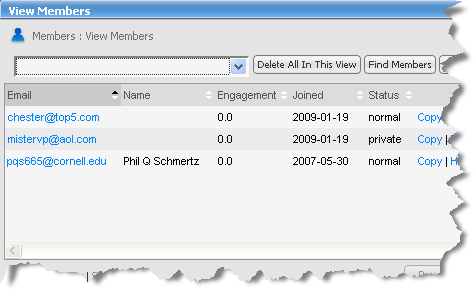
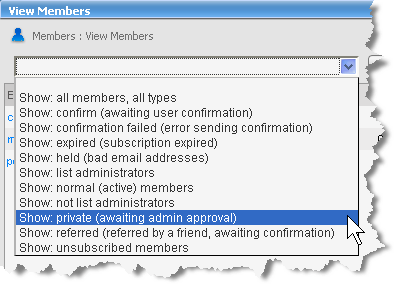
In this example you can see that mistervp@aol.com has requested to join, as his membership status shows as private. (Another status — confirm — means that the member needs to respond to a confirmation email before their membership is activated. It’s easy to confuse these two.) - If your list has more than just a few members, you’ll want to have Lyris show you only the members who are waiting. Select in the dropdown list near the top, then click go. This will show you only the members with private for their status.
- To approve and activate a person’s membership, click on the members name, then click the gray tab.
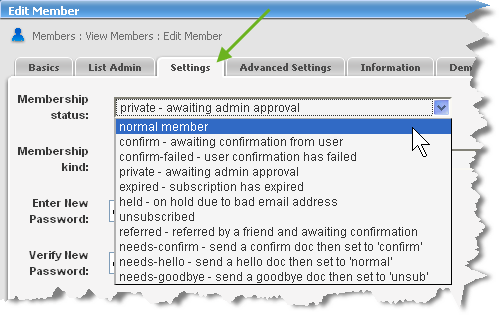
- If you want the new member to receive your list’s welcome message, in the Membership status dropdown list, select , then click . If you do not want the new member to receive your list’s welcome message, in the Membership status dropdown list, select , then click .
Repeat steps 5 and 6 for other members as necessary.
What about a person who has asked to join, but it’s not appropriate for them to be a member of this list?
Follow steps 1-4 above. Then just click on that person’s row, and confirm your decision to delete. The member will NOT be informed of your decision, so you may want to send them an email letting them know. (Otherwise they might try again. And again. And complain that the system is broken.)
Comments?
To share feedback about this page or request support, log in with your NetID