Install CU VPN for Mac
Install the Cisco Secure Client software to connect to Cornell's VPN service. You must have administrative privileges to install the software.
This article applies to: CU VPN
Enter the following:
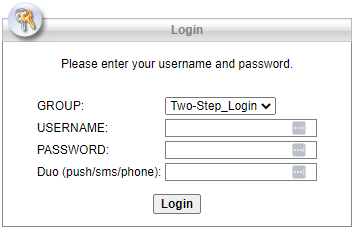
- Connect to https://cuvpn.cuvpn.cornell.edu. The SSL VPN Service Login dialog box will open.
- Enter the following:
- In the Group box, select Two-Step_Login. This is required for all VPNs as of July 15, 2021.
- In the User Name box, enter your Cornell NetID or GuestID.
Note: If you are connecting to a departmental VPN, enter your NetID and the name of the departmental group, for example, pqs665@departmental_group_name. - In the Password box, enter your NetID password.
- In the DUO Passcode (push/SMS/phone) box, type one of the following options to complete Two-Step Login:
pushto send a login request to your smartphone or other mobile devicephoneto call you on your mobile phone or landlineSMSto receive a new set of passcodes. (You'll need to log in again.)- A passcode from a hardware token
- A Downloads page will appear after a successful login. It may take a few seconds to a few minutes to collect information about your system.
- If you see two tabs labeled Download and Automatic Provisioning, select . (It's okay if you don't see these tabs.)
- Click .
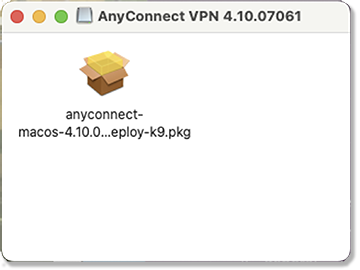
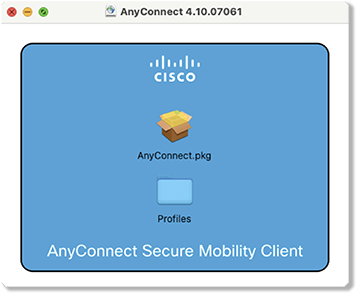
- Navigate to your default downloads folder and double-click the anyconnect dmg file, then double-click the anyconnect pkg file.
You may be asked to enter an administrative password for your computer.
There two ways to get the DMG, which will change the next step on Install.
If you download via cupvn.cuvpn.cornell.edu (headend), you will get a DMG (webdeploy) that does not need to select the Installation Type.
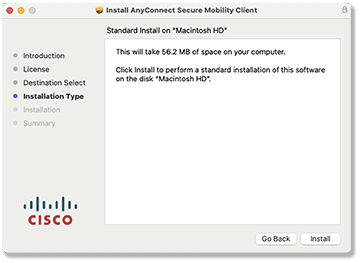
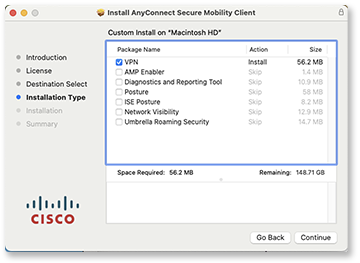
If you download the Cisco installers (out-of-band) from downloads.cornell.edu/vpn – you’ll need to select the tools as below. - Follow the on-screen instructions.
If asked, on the Installation Type screen, make sure VPN is selected and everything else is not selected.
Webdeploy panel (skips the selection): Cisco panel (from download):
During the client install, a pop-up window will appear. You will be prompted to grant local administrator (not Cornell) approval for two items. Grant approval with your MacOS fingerprint reader or password. Allow/enable Cisco Secure Client to run, and Cisco Secure Client - Socket Filter to support safe DNS. If the pop-up notifications disappear before you can click on them, click on the date/notification bar to re-display.
- If installing on macOS 10.13 (High Sierra) or higher, you may see System Extension Blocked alert. If you see this alert, follow the lettered steps below. Otherwise, continue with step 9 below.
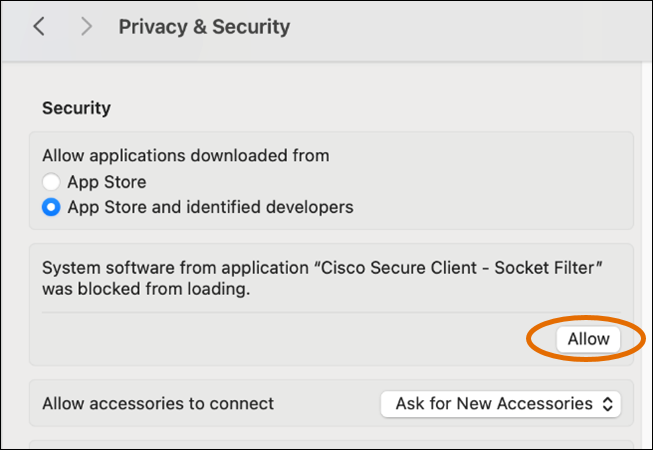
- Click (or ). The System Preferences - Security & Privacy panel will open.
- Unlock the Panel clicking on the lock icon in the lower left corner.
- Next to System software from application "Cisco Secure Client - Socket Filter" was blocked from loading click .
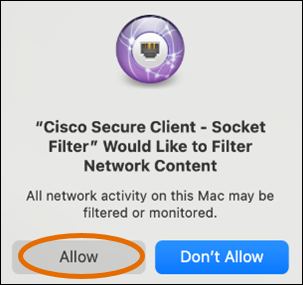
- A Pop-up “Cisco Secure Client - Socket Filter” Would Like to Filter Network Content – click .
- Close the Security & Privacy Panel.
- Click or on the Extension Blocked dialog box.
- Close the installer.
For information about connecting using the CU VPN, see our Connect Mac to CU VPN article.

Comments?
To share feedback about this page or request support, log in with your NetID