Install CU VPN for Linux
Install the Cisco Secure Client software to connect to Cornell's VPN service. You must have administrative privileges to install the software.
This article applies to: CU VPN
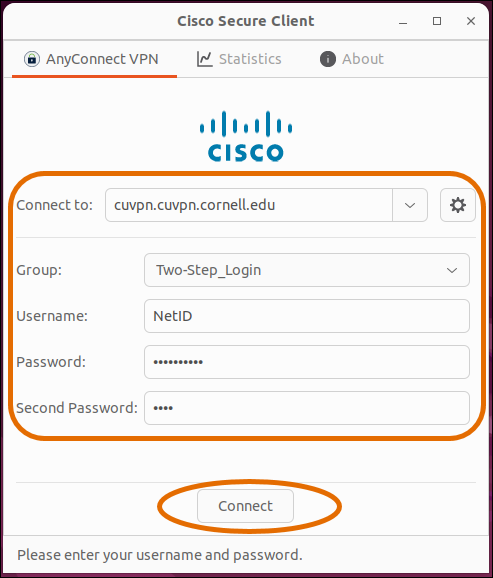
Enter the following:
- Connect to https://cuvpn.cuvpn.cornell.edu. The SSL VPN Service Login dialog box will open.
- Enter the following:
For information about connecting using the VPN, see our Connect Linux article.
- In the Group box, select Two-Step_Login. This is required for all VPNs as of July 15, 2021.
- In the User Name box, enter your Cornell NetID or GuestID.
Note: If you are connecting to a departmental VPN, enter your NetID and the name of the departmental group, for example, pqs665@departmental_group_name. - In the Password box, enter your NetID password.
- In the Second Password box, type one of the following options to complete Two-Step Login:
pushto send a login request to your smartphone or other mobile devicephoneto call you on your mobile phone or landlineSMSto receive a new set of passcodes. (You'll need to log in again.)- A passcode from a hardware token
- A Downloads page will appear after a successful login. It may take a few seconds to a few minutes to collect information about your system.
- If you see two tabs labeled Download and Automatic Provisioning, select . (It's okay if you don't see these tabs.)
- Click .
- Locate the downloaded file, named anyconnect-linux64-[version]-core-vpn-webdeploy-k9.sh. Downloaded files are usually stored in /home/
<username>/Downloads. The download location is used for ${DOWNLOAD} in the following step. Make note of the filename, which contains a version number. If your version number is different from the number shown in the next step, be sure to use your script's exact name. - Execute the install shell script with sudo access in a Terminal window:
sudo /bin/sh ${DOWNLOAD}/anyconnect-linux64-4.4.03034-core-vpn-webdeploy-k9.sh - Close the installer.


Comments?
To share feedback about this page or request support, log in with your NetID