Trim Zoom Cloud Recording Start and End Points in Canvas
Change the beginning and end points of your cloud recordings in Canvas to remove unnecessary material before sharing with others.
This article applies to: Zoom
Many instructors find it useful to trim the start end points of the Cloud Recording of a class session. You might want to do this to remove dead air, random chatter, or false starts from your presentation.
Log in to your Canvas account with your NetID credentials. Then:
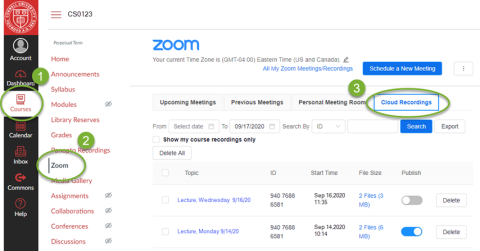
- Click Courses, then navigate to the course containing the recording that you wish to edit.
- In the menu on the left side, click Zoom.
Click the Cloud Recordings tab.
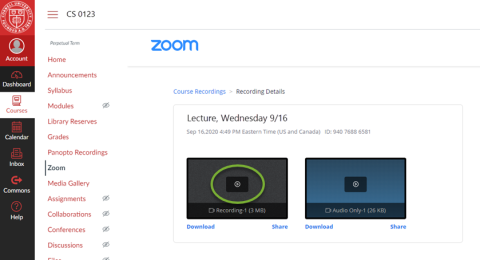
- In the Topic column, click the title of the recording you wish to edit. This will open the Recording Details screen.
Click the Play icon (small arrow in black box). This will open the recording in a media player. (If you started recording more than once during a meeting, you may see more than one recording displayed. Choose the Play icon in the recording you want to edit.)
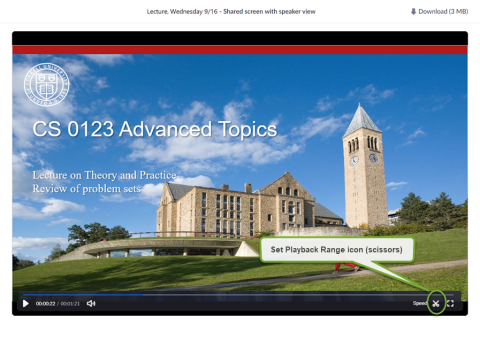
Click Set Playback Range (white scissors icon at lower right).
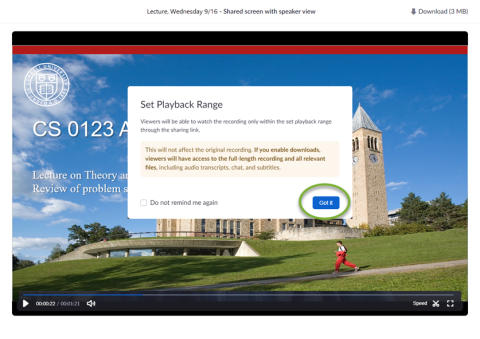
- The system will warn you that:
- Anyone you share the recording with will see the trimmed version, and
If you enable downloads for the recording, any participant who downloads it will be able to see the entire recording, as well as audio transcripts, chat, and subtitles.
Click Got it to proceed. (If you prefer not to see this warning in the future when trimming a recording's playback start and end points, mark the Do not remind me again box first.)
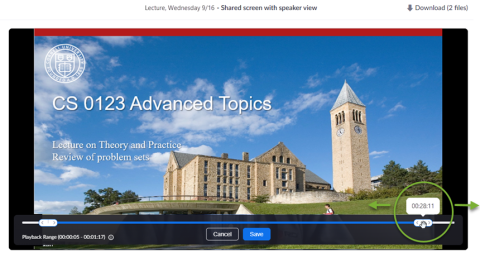
Use the sliders at the start and end of the video timeline to set new times by dragging to the left or right. The controls will display the new range of start and end times.
- When you are satisfied with the new start and end points, click Save.
- To review the trimmed recording, click the Play button. When done, close the recording preview window or browser tab.
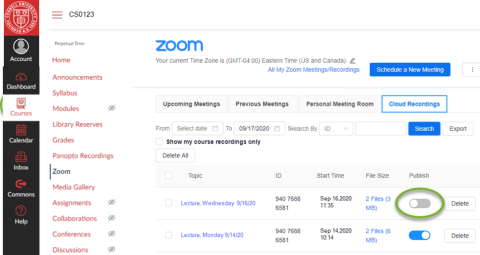
When you’re ready to share the recording with students, from the Cloud Recordings tab, click the Publish slider for the Topic you wish to share. The slider will move to the right and turn blue when the video has been published. To unpublish, click the slider again (it will slide to the left and turn gray).

Comments?
To share feedback about this page or request support, log in with your NetID