Sign In for the First Time to Azure Virtual Desktop
This article applies to: Azure Virtual Desktop
- Open the Windows App Web Client (click to launch in your default browser).
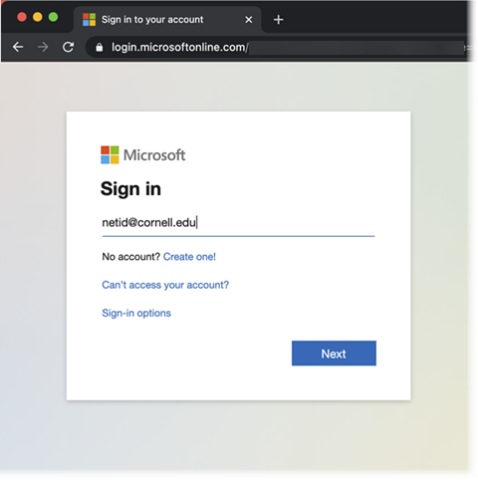
On the Microsoft Sign in page, enter your Cornell NetID email address (netid@cornell.edu), then click Next.
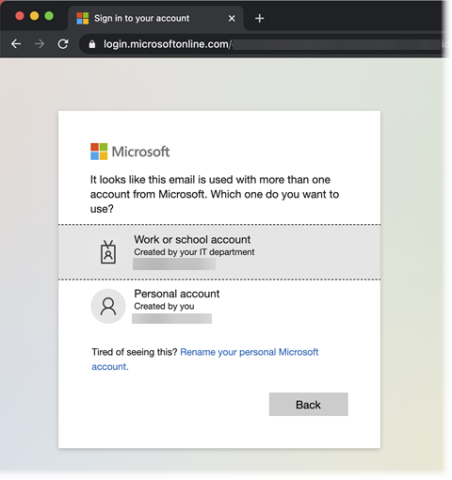
Click Work or school account. Do not use any personal Microsoft account you might own.
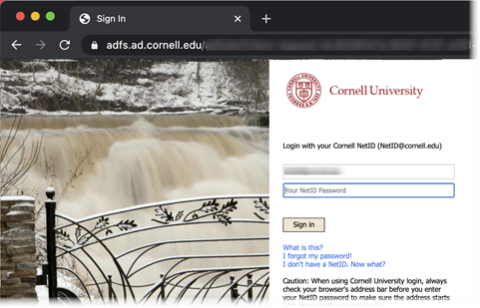
Continue your sign in using your Cornell NetID email address (netid@cornell.edu) and password, then click Sign in. Authenticate with Two-Step Login if requested.
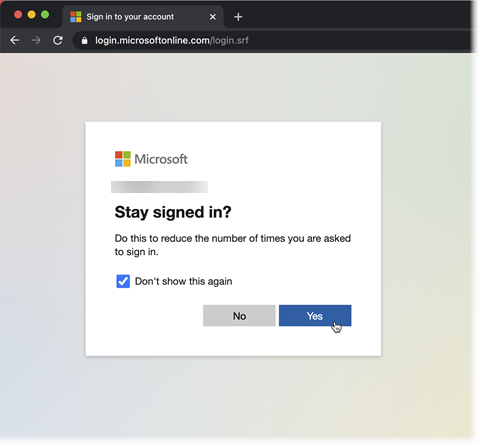
On the Stay signed in page, click Yes to reduce how often you need to sign in (recommended, not required).
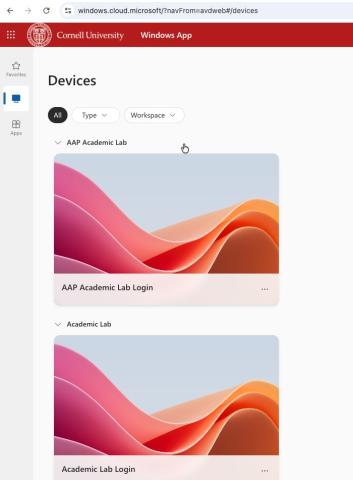
The Azure Virtual Desktop shows the apps you have been assigned. Double-click an icon to launch that app or service.
- When launching an app, you will again need to Enter your credentials. In the Username and Password fields, type your Cornell NetID email address and password. Click Submit to launch the virtual app.
- At the Access Local Resources screen, select the types of access you wish to allow between your local computer and the virtual app. To save these selections for future sessions and avoid this screen in future sessions, mark the checkbox Don’t ask me again for connections to this computer. Click Allow to accept the access settings, or Cancel to return to the virtual desktop.
Comments?
To share feedback about this page or request support, log in with your NetID