Scan for Confidential Data on External Drives: Windows
The information in this article is intended technical staff who support end-users. It is unusual for an end-user to need this information.
This article applies to: Spirion (formerly Identity Finder)
You can use Spirion to scan the following:
- External hard drives
- Thumb drives
- CDs and DVDs
- Mounted Disk Images (servers mapped to a drive letter on your machine)
If you are scanning a folder on a server, you should map the server to a drive letter on your machine.
- From the Start menu, select . If this is the first time you’ve used Spirion, continue with Step 2. Otherwise, skip to step 3. If your computer has multiple profiles, you must run Spirion with elevated (admin) privileges in order to scan all of the profiles. Right-click Spirion and click . Type the administrator password, and then click .
- In the New Spirion Profile window, enter a password, confirm the password, and then click . In the Profile Password box, click . Note: Do not use your NetID password.
- If prompted, in the Spirion Profile Sign In window, enter your password, and then click .
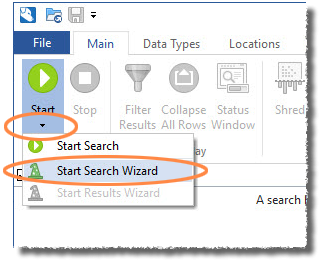
On the Main tab, click the small arrow below the Start icon, then select Start Search Wizard.
- The first wizard screen specifies what to look for. Click Next.
- On the wizard Locations screen, on the Custom Location line, click the three dots icon.
- Select the drive (or mapped folder), then click OK.
- Back on the Locations screen, click Next.
- On the Confirmation screen, click Finish. Spirion begins scanning. You’ll see a Status window where you can track the scan progress.
- When the scan is complete, Spirion displays a list of files containing confidential data. If you want to save the results file (this is optional),
- Click , then choose a location and file name.
- Enter a password to use for the scan results file, confirm the password, and then click . Note: Do not use your Spirion profile password or your NetID password for the results file.
- If you wish to review the results, click .
- Review the list of files identified by the scan. You must look at each file and decide how to deal with it. Always follow local practices to determine the best way to handle files identified by the scan. For more information, see How to Handle Scan Results.
- When you have dealt with all the files in the list, quit Spirion.


Comments?
To share feedback about this page or request support, log in with your NetID