Add a Printer (Windows)
Procedure for using PrinterLogic to add a printer.
This article applies to: PrinterLogic
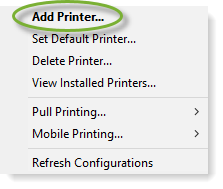
- Right-click the PrinterLogic icon
 , located in your Windows System Tray (on the right side).
If you have many icons in your Windows System Tray, you may need to click the Show Hidden Icons arrow ( ^ ) to expand the full list of application icons. If you can't find the PrinterLogic icon in your System Tray, and your support group uses PrinterLogic, please contact the IT Service Desk.
- Click Add Printer from the PrinterLogic menu to open the self-service portal.

- If you see a message prompting you to install an extension on your browser, follow the instructions Install PrinterLogic Browser Extension (Windows).
- If the webpage prompts you to log in, click Current User. If you get an error, please contact your local IT Support Group.

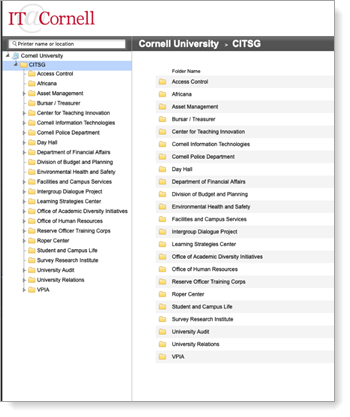
- At the PrinterLogic portal, you will see a folder structure on the left side, sorted alphabetically by Department > Building > Floor. Use the small arrows to expand subfolders for departments and buildings until you can select the folder for your floor or area. When you have selected your area, you should see a list of available printers on the right side.

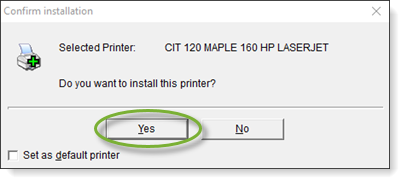
- Browse the list to find the printer you want to install, then click its name. A dialog box will ask you to confirm that you want to install the printer. If you want this printer to be your default, click the checkbox Set as default printer.
- Click Yes to confirm.

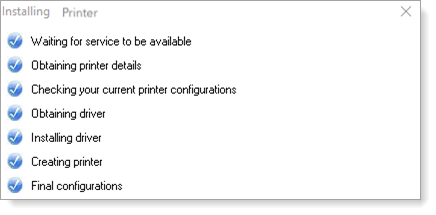
- A pop-up window will display the progress of each step of your printer installation and confirm that the process has completed.

If you encounter any issues installing a printer, contact the IT Service Desk for assistance.

Comments?
To share feedback about this page or request support, log in with your NetID