Install PrinterLogic Browser Extension (Mac)
If, when you try to add a printer using PrinterLogic, you get a message that the PrinterLogic browser extension is not installed, follow the instructions below specific to your browser (Safari, Chrome, or Firefox).
This article applies to: PrinterLogic
The PrinterLogic browser extension should install automatically. You do not need to follow the steps on this page unless you see an alert telling you that the extension is not installed.
Safari
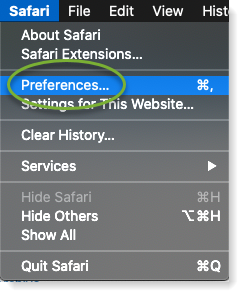
- Open Safari. Click the Safari menu at the top left corner. Click Preferences.
- Click Extensions, then find the PrinterLogic Extension in the list on the left side. Check the box next to PrinterLogic Extension.
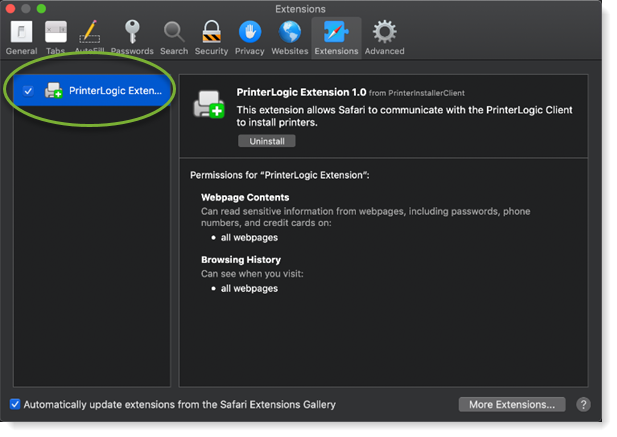
If you cannot find the PrinterLogic Extension in the extensions list, contact the IT Service Desk at 607-255-5500 for assistance.
- Close the Extensions window. The PrinterLogic extension has been installed.
Chrome
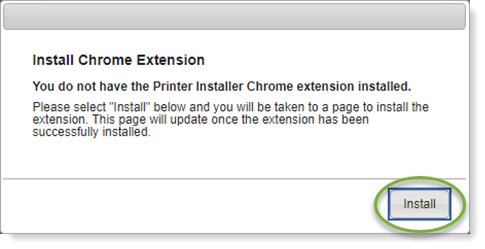
- If, when you try to use the PrinterLogic extension, you see the following alert, click Install.
- Next, under the PrinterLogic Chrome Extension Installation heading, click Install Extension.

- In the listing for the PrinterLogic Extension, click Add to Chrome.

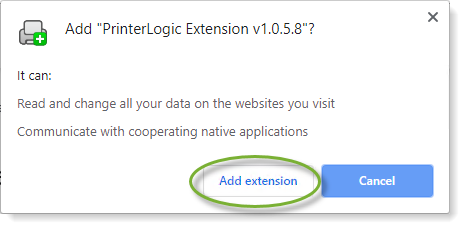
- Then, when the window asks if you want to add the extension, click Add Extension.
- You will know the extension is installed when you see the icon
 in the upper right corner.
Firefox
- If, when you try to use the PrinterLogic extension, you see the following alert, click Install.
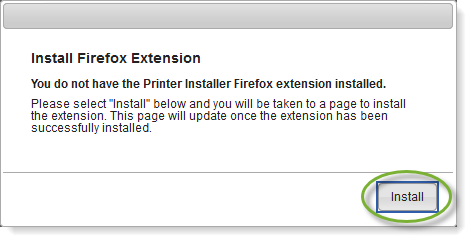
- Next, under the PrinterLogic Chrome Extension Installation heading, click Install Extension.

- A dialog window at the left side of the address bar will appear. Click Allow.
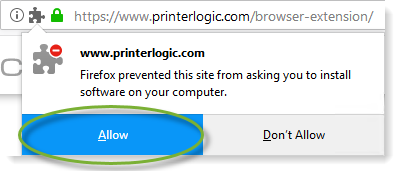
- The next prompt will confirm permissions for the PrinterLogic extension. Click Add.
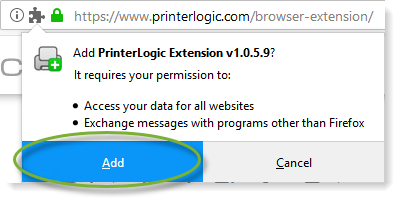
- Firefox will confirm that the extension has been added. Click OK to continue.
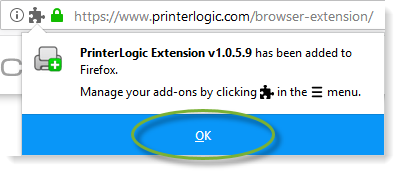
- After the extension is installed, you will see its icon
 in the browser menu bar.

Comments?
To share feedback about this page or request support, log in with your NetID