Transfer Files During Zoom Meetings
This article applies to: Zoom
In-meeting file transfer allows attendees to send files during Zoom meetings and webinars through the Chat panel. Files can be sent to all participants or directly to another specific attendee.
Enable In-Meeting File Transfer
Before using this feature for the first time, a host must enable the feature in Zoom settings. This will only need to be done once.
Use caution when enabling in-meeting file transfer. Because of potential security risks (for example, a file containing malware could be shared, or you might inadvertently share sensitive or restricted data with participants), only enable file transfers when absolutely necessary.
- If you only need to transfer a file in a particular meeting or webinar, consider disabling afterward.
- Consider limiting the types of files that can be transferred (see Step 4 below).
To enable in-meeting file transfer for your meetings:
- Log in to the Cornell Zoom website (cornell.zoom.us).
- Select Settings, then the Meeting tab. Under In Meeting (Basic), scroll to Send Files Via Meeting Chat.
Select the slider toggle located to the right of Send files via meeting chat. (The slider will turn blue when enabled.) Confirm by clicking Enable.

To restrict the types of files allowed to transfer, select Only allow specified file types. Use the text box to type the file type extensions (for example,
.docxor.pptx) that you want to allow, separated by commas.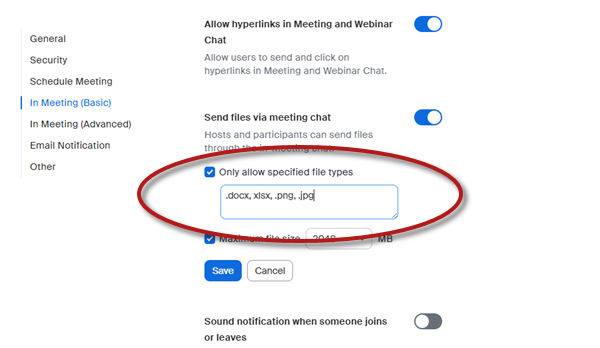
To restrict the size of files that attendees may transfer, check Maximum file size. When checked, this limits shared file size to 2048 MB (which is the only available value).
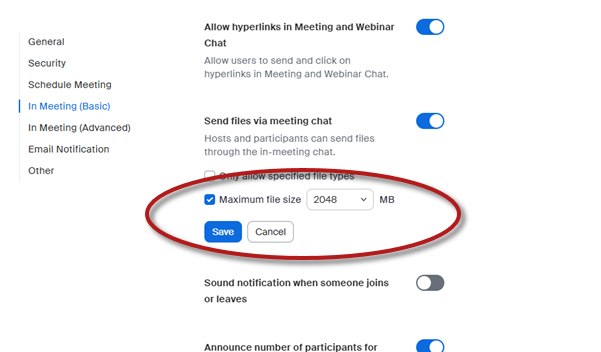
- Click Save.
Transfer Files During a Meeting or Webinar
While in a Zoom meeting:
- Click Chat (if the Chat panel is not already open).
At the bottom of the Chat panel, use the To dropdown menu to select either Everyone or the name of a particular attendee to share the file with.
Then click the File icon (small page icon with folded corner).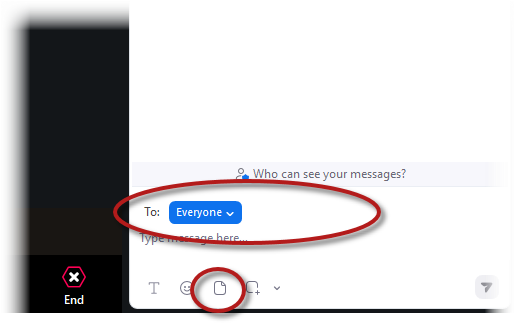
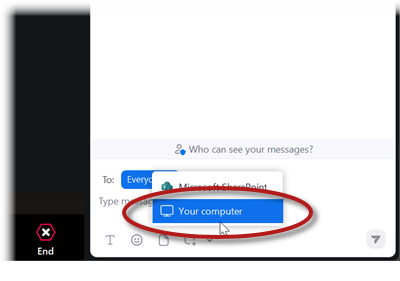
Then select to upload a file from your device. Use the window to locate the file you want to transfer.
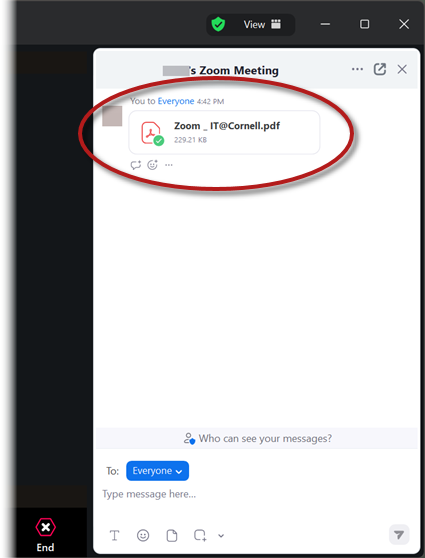
Recipients of the transferred file will see a notice in their Chat feeds. They can click the notice to download the transferred file.
Comments?
To share feedback about this page or request support, log in with your NetID