Send and Receive Files (Users with a NetID)
This article applies to: Cornell Secure File Transfer
If you have a Cornell NetID, you can use Cornell Secure File Transfer to send and receive files from people who have Cornell NetIDs. You can also exchange files with people who do not have a NetID if you add their email address to your Whitelist.
Send a file
- Go to Cornell Secure File Transfer.
- Click NetID Login, then login with your NetID / password and Two-Step Login.
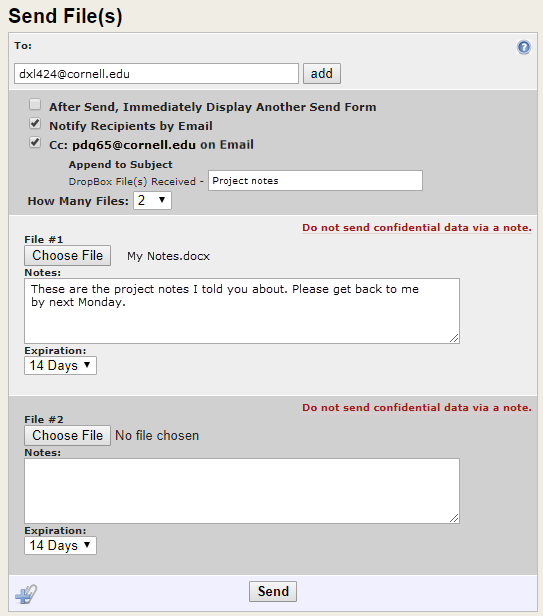
- Click Prepare Upload. The Send File(s) page will open.

- Specify recipients in the To: field:
- For Cornell recipients, enter the person’s NetID and click .
- For non-Cornell recipients, enter the person’s email address and click .
- You can add additional recipients by repeating step 4a or 4b as needed.
- By default, Notify Recipients by Email is checked, and it's recommended you leave it checked.
- By default, cc: is checked. This means you will be sent a copy of the email. It's also recommended you leave this checked.
- By default, the email subject line will be "Secure File Transfer File(s) Received." You can add a short label or description to help the recipients understand what file you are sending.
- Use the How Many Files dropdown list to specify the number of files you’ll be sharing with these recipients. The system will create a box for each file, named File #1, File #2, etc.
- For each file to be sent:
- Click Browse and navigate to your file.
- Text entered in the Notes field will appear in the notification email message with the file name and link.
- Use the Expiration drop-down list to indicate how long the file will remain available to the recipients.
- In the event you need to add more files than you originally specified in step 8, either scroll up and use the How Many Files dropdown to select a larger number of files, or click the Add Another File button (resembles a plus with a paper clip).
- Click Send when done adding files.
- If you included a non-Cornell address, you will need to give the recipient the password you assigned during the whitelisting process.
Notify the recipients
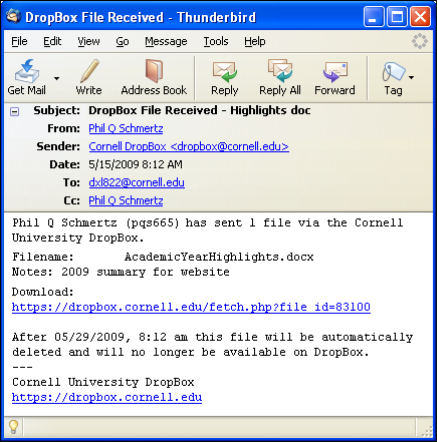
- If you left the Notify Recipients by Email box checked in step 5 in the Send a File section above, each recipient will get an email message with the file names, notes, and links to the files. This is the recommended method. For important security considerations, see Avoid Revealing Confidential Information in Email.
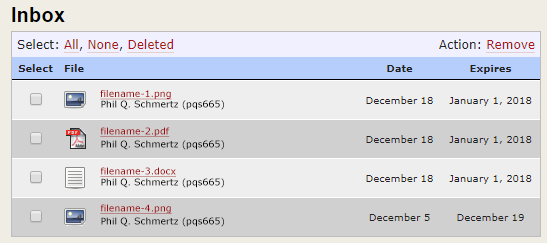
- If you turned notification off, you’ll need to tell your recipients to log into Secure File Transfer and look in their Inbox for your file. The detailed procedure is given below for users with NetIDs and here for external users.
- You will be identified in the notification email by the way your name is stored in the Cornell directory.
Receive a file
- Click on the link in the email you received.

- Click NetID Login then login with your NetID and password.
- Click Download.
- Save the file.
OR
- Go to Cornell Secure File Transfer.
- Click NetID Login then login with your NetID and password. You’ll be shown the contents of your Inbox.

- Click the name of the file you want to download. To select more than one file, click the checkbox beside each file. To select all files click All, or to de-select all files click None.
- Click Download.
- Read the security notice, then click Download again.
- Save the file.

Comments?
To share feedback about this page or request support, log in with your NetID