Set Your Printer for Color or Black and White Printing
Follow these instructions to set up a printer so that it will always print either in color or in black and white (grayscale).
This article applies to: PrinterLogic
On a Windows computer, choosing monochrome or color printing for your printing is easy.
Find Print Preferences in Windows
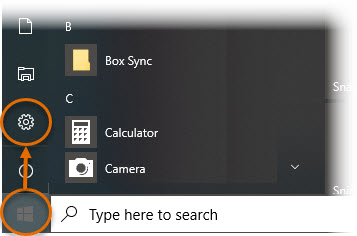
- Open Windows Settings by clicking the Windows Start icon, typically located at the bottom left corner of your desktop. Then click the Settings (gear) icon.
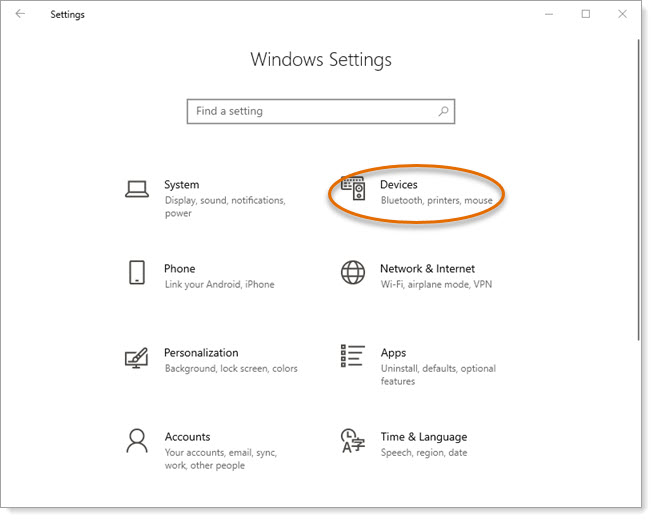
- On the Settings menu, click Devices.
- Click Printers & scanners.
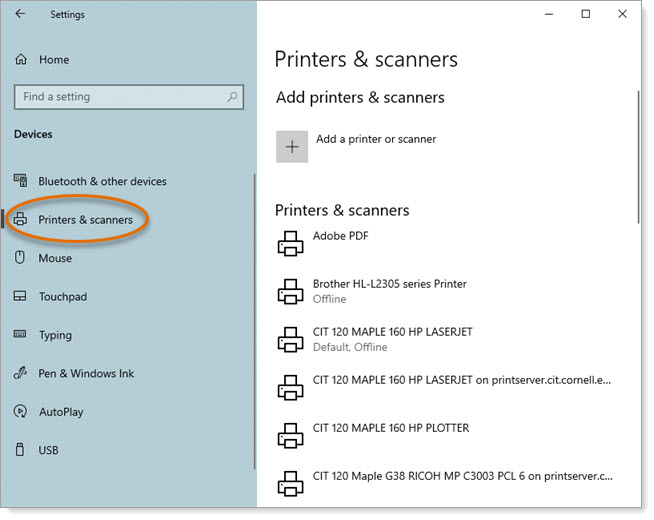
- From the list of installed printers, click the name of the printer you want to set up. This expands the listing to give more choices. Click Manage.
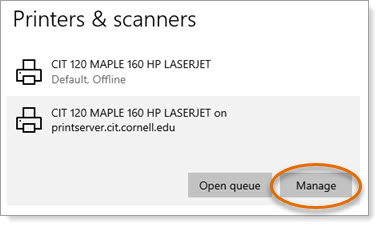
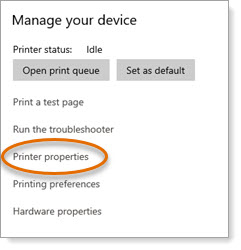
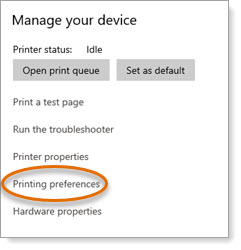
This opens the Windows Manage your device screen.
Brand-Specific Instructions
For brands not covered in these instructions, after clicking Manage, you should explore the printer or printing properties screens for your printer and look for an option called “Color Settings” or “Select Color,” with options such as “Color,” “Grayscale,” or “Monochrome.”
Ricoh
- At the Windows Manage your device screen, click Printer properties.
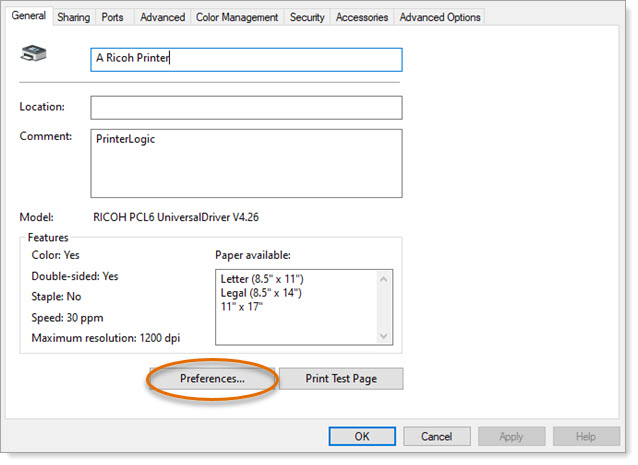
- Click Preferences.
- From the Color Mode dropdown, choose either Color or Black and White.
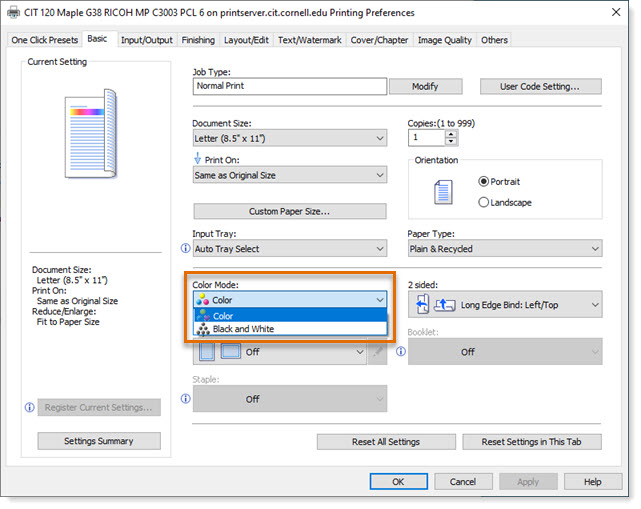
- Click OK to save.
Konica
- At the Windows Manage your device screen, click Printing preferences.
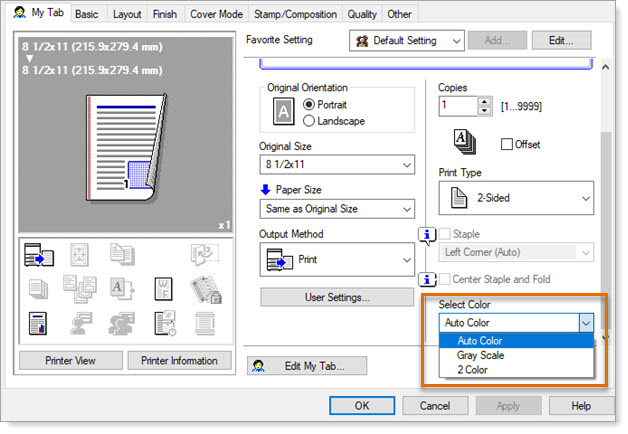
- Under Select Color, at the bottom right of the screen, choose:
- Auto Color, for color printing.
- Gray Scale, for black and white printing.
- Click OK to save.
HP
- At the Windows Manage your device screen, click Printing preferences.

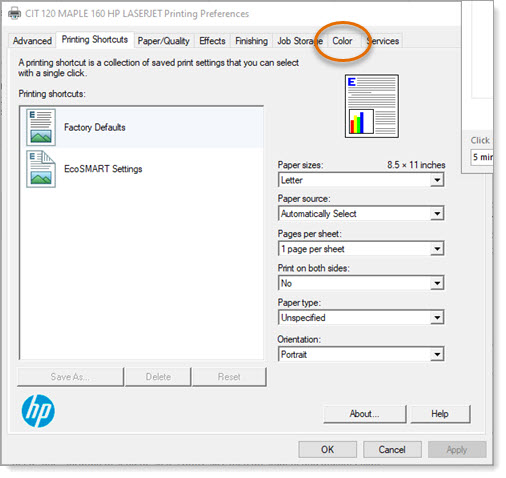
- On the HP printer’s Printing Preferences screen, click the Color tab.
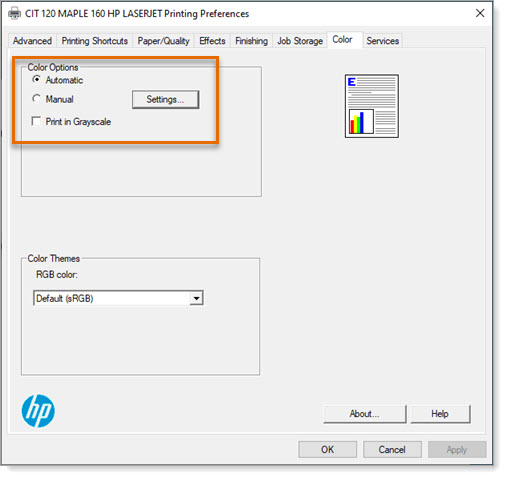
- Under Color Options, either:
- Click the Automatic radio button to print in color.
- Click the Print in Grayscale checkbox to print in black and white.
- Click OK to save.

Comments?
To share feedback about this page or request support, log in with your NetID