Create Membership Rules for Dynamic Groups (CornellAD Group Management)
This article applies to: Active Directory Management
There are many ways to use dynamic groups. Here we'll describe how to set up dynamic groups for a few common situations.
The procedures below assume you are working with a brand new dynamic group. If you are returning to an existing dynamic group, double-click on the group, then select the tab. Then follow the procedures listed below. Some details will be slightly different (for example, you will see an OK button instead of a Finish button), but the concepts are the same.
Create a Dynamic Group Made Up of Objects That Are Members of Both GroupA and GroupB
For our example, the dynamic group (named PRE-mammals) will include only the objects that are members of the group PRE-warmblooded and the group PRE-livebirth.
Remember that you must use the ARS console, not the web interface.
- If you have just converted a group into a dynamic group, the New Membership Rule Wizard is already open.
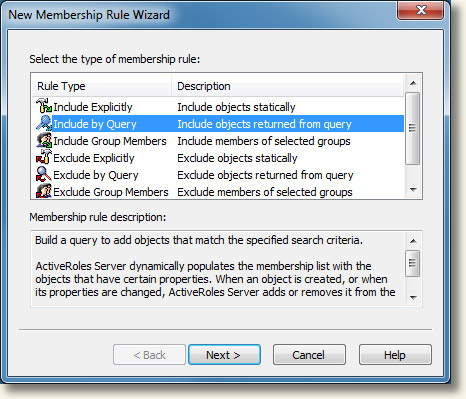
If the Wizard is not open, navigate to your group, right-click on it and select . If you do not see this choice, it means you have not yet converted this group into a dynamic group, so you need to follow the procedure above. - On the New Membership Rule Wizard dialog box, select , then click .
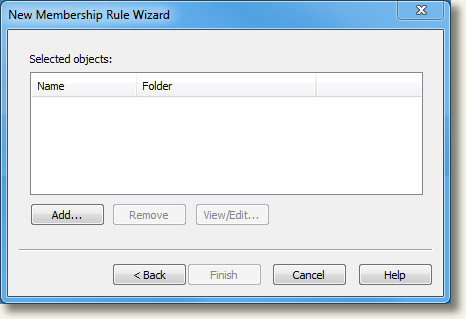
- On the Selected Objects dialog box,click . A Create Membership Rule dialog box will open.
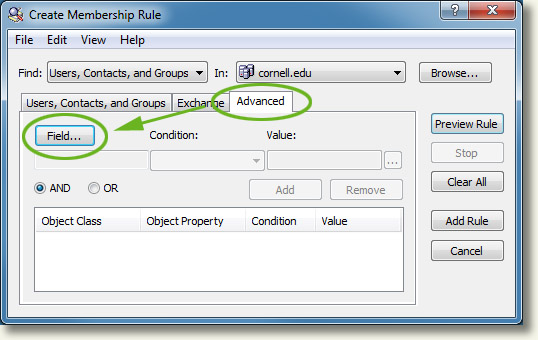
- Click the tab.
- Select the radio button.
- Click .
- On the Select Object Type and Property dialog box, under Object property, select , then click .
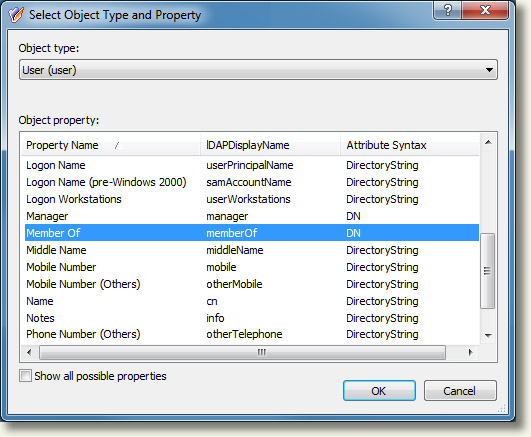
- Back on the Create Membership Rule dialog box, from the Condition drop-down, select .
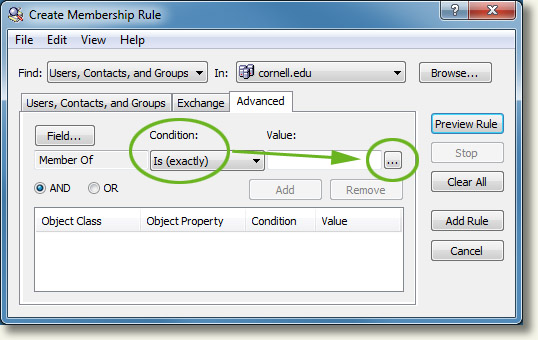
- Click the button next to the Value field.
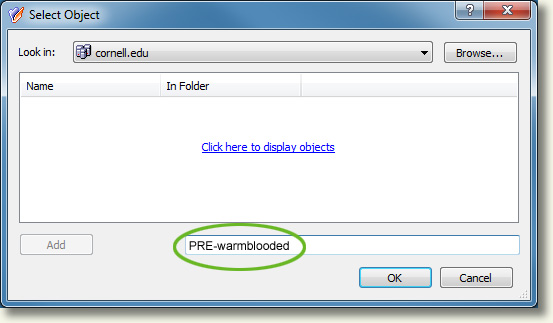
- On the Select Object dialog box, type the beginning of (or all of) the name of the group in the text field near the bottom, including the prefix for your OU, and press . (In the example given above, this would be the "PRE-warmblooded" group.)
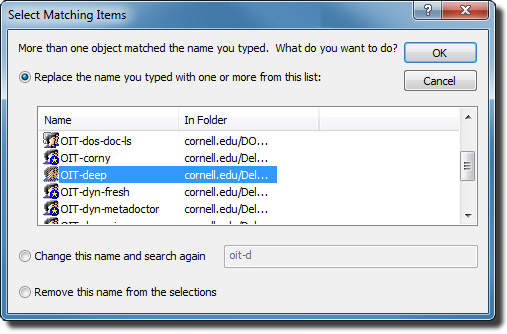
- From the list displayed on the Select Matching Items dialog box, select the name of the group and click . (If only one item matched what you entered, you won't see this dialog box; you'll go straight to the next step.)
- Back on the Create Membership Rule dialog box, click . (NOT )
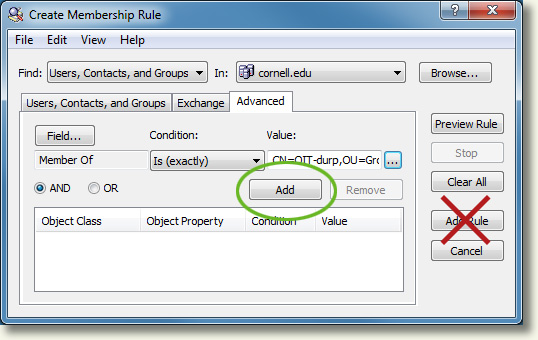
- Repeat steps 5-12 to add the other group. (In the example given above, this would be the "Livebirth" group.) You can have as many conditions within a rule as you like by repeating steps 5-12. Be sure to finish each repetition by clicking .
- Click . The Create Membership Rule dialog box will close, returning you to the New Membership Rule Wizard.
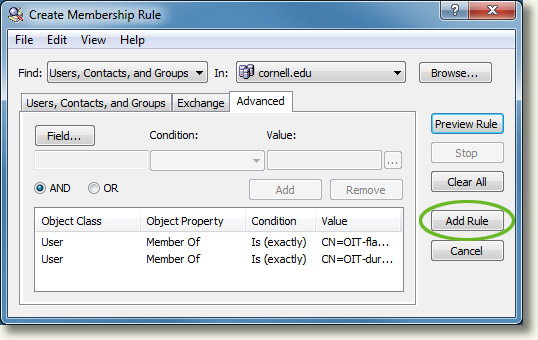
- Click .
Create a Dynamic Group Made Up of Objects That Are Members of Either GroupA or GroupB (or Members of Both)
- If you have just converted a group into a dynamic group, the New Membership Rule Wizard is already open.
- On the New Membership Rule Wizard dialog box, select , then click .
- Click .
- In the lower text field, type a group name (or the beginning of one), then click . If only one group is found that matches, it will be shown in the lower field. If more than one matching group is found, a list will be displayed. Select the desired group, then click . You can enter multiple group names, separated by semi-colons. Click when you're finished adding groups. (Or you can create a second rule using Include Group Members and list the second group separately. Either method give identical results.)
- Click .
Create a Dynamic Group Made Up of Objects That Are Members of GroupA But Not of GroupB
- If you have just converted a group into a dynamic group, the New Membership Rule Wizard is already open.
- On the Membership Rule Type (or New Membership Rule Wizard) dialog box, select , then click .
- Click .
- In the lower text field, type the name of GroupA (or the beginning of it), then click . If only one group is found that matches, it will be shown in the lower field. If more than one matching group is found, a list will be displayed. Select the desired group, then click .
- Click , then .
- Double-click on the group, then click the tab.
- On the Properties dialog box, click .
- On the Membership Rule Type dialog box, select , then click .
- In the lower text field, type the name of GroupB (or the beginning of it), then click . If only one group is found that matches, it will be shown in the lower field. If more than one matching group is found, a list will be displayed. Select the desired group, then click .
- Click to close the Select Objects dialog box.
- Click to close the Properties dialog box.
The other rule types are Include Explicitly and Exclude Explicitly. These are the "snapshot" rules. If you specify a group name in one of these rules, the current membership of the group is selected and applied to your dynamic group. If changes occur to the group you specify, those changes will NOT affect your dynamic group.
Again, we recognize that this is a complicated procedure. Feel free to contact CIT's Identity Management group for assistance.

Comments?
To share feedback about this page or request support, log in with your NetID