Use the Zoom Room Whiteboard
This article applies to: Zoom
Zoom Room Whiteboard Controls
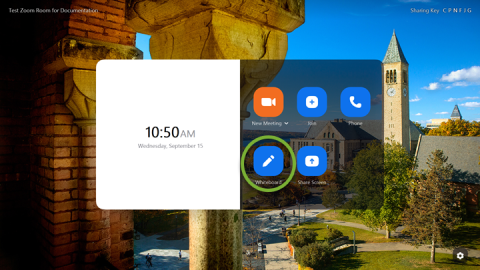
To start a digital whiteboard from the Zoom Room touch interface:
In the control bar, tap Whiteboard.
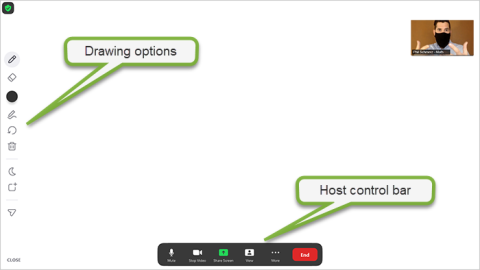
This opens a new, blank digital whiteboard screen.
Use the digital whiteboard control bar to tap options for drawing using the stylus.
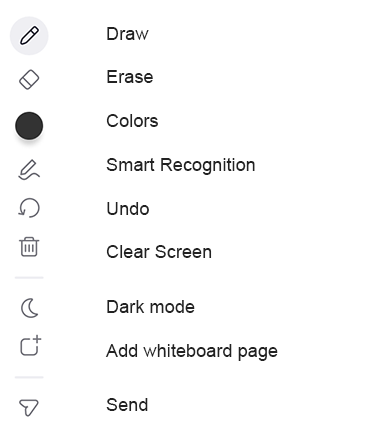
From top to bottom, the controls are:
Draw (pencil icon) Use the touch panel stylus to draw lines freehand on the whiteboard.
Eraser (eraser icon) Use the touch panel stylus to erase from the whiteboard.
Colors (shows circle of currently chosen color) Select a new color from the choices.
Smart Recognition (shows pencil drawing a line) Tap Smart Recognition to have Zoom Rooms straighten lines and shapes automatically or tap None or turn off. Tap a choice under Line Thickness to change the thickness of lines drawn on the whiteboard.
Undo Undo the previous action.
Clear screen (trash can icon) Clears the entire current whiteboard page.
Dark mode (moon icon) Change the digital whiteboard’s background to black.
Add whiteboard page (rounded square with a plus sign) Add a new digital whiteboard page. When you have multiple pages, the number of pages will appear in the middle of the icon. You can then tap the icon to view and delete pages.
Send (wide arrow pointing up and to right) Tap to send an image of the current whiteboard contents. (For details, see below, Send an Image of a Digital Whiteboard.)
Close Close the digital whiteboarding session.
Add and Manage Whiteboard Pages
Tap the Add Whiteboard Page icon to add a new blank whiteboard page.
When more than one whiteboard page exists, the Select Whiteboards icon will appear, indicating the current number of whiteboard pages.
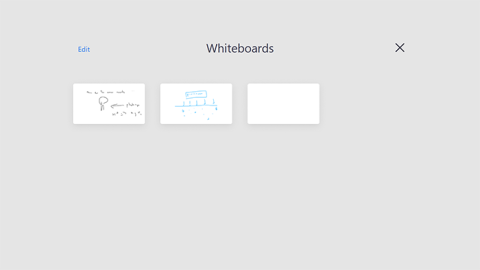
Tap this icon to open the Whiteboards page. Here:
- To open a whiteboard page, tap its thumbnail image.
- To remove a whiteboard page, tap Edit, then tap Delete (small circled x) at the top right of the thumbnail.
- To return to the Whiteboards selection page, click Done.
- To return to the current whiteboard, click the large X at the top right.
Send an Image of a Digital Whiteboard
To send an image of the current digital whiteboard to some or all meeting participants:
- On the Zoom Rooms whiteboard controls, tap the Send icon.
- To send an image of the current whiteboard to all current meeting participants, tap Select All Participants.
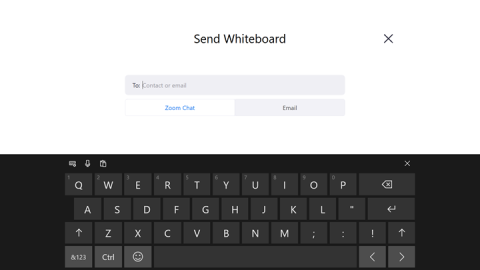
To send an image of the current whiteboard to individual meeting participants, begin typing a contact name or email address, using the touch panel keyboard. Individuals whose names or email addresses match what you type will appear in a list under the heading Participants. Tap a participant name to select and add it to the list. Repeat to add more individuals to the send list.
- Next, choose how to deliver the whiteboard image. Tap either:
- Zoom Chat, to send to the Chat option in the participants’ Zoom client (not the Chat panel in the current meeting), as shown below. To open the Zoom client’s Chat screen, click the Chat icon in the top menu. If necessary, click the small arrow to the left of Chats in the left side panel to expand the list of chats and find images sent from the course meeting.
- Email, to send to the participants’ email. The whiteboard image will be attached to the email.
- Tap the Send icon to send the whiteboard image to the selected participants by the chosen method.

Comments?
To share feedback about this page or request support, log in with your NetID