
Add or Restore Zoom Integration with Microsoft 365 Calendar
Use these instructions to add (or restore) an integration between your Zoom desktop client and your Microsoft 365 calendar.
This article applies to: Zoom
Check a Calendar Integration
If you previously enabled the calendar integration, instead of seeing upcoming meetings on the Zoom desktop client’s Home screen, you will instead see an Add a Calendar link.
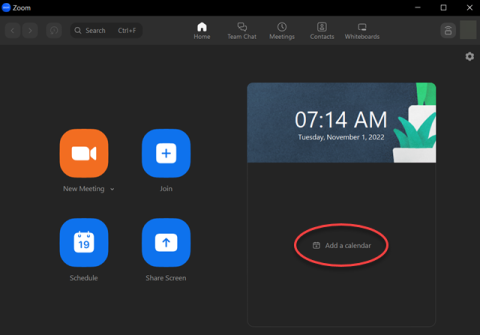
Add or Restore a Microsoft 365 Calendar and Contacts Integration
To add or restore an integration between the Zoom client and Microsoft 365:
- Open the Zoom desktop client and sign in.
- Click Home.
In the area below the date and time display, click Add a calendar. This begins the integration setup process.
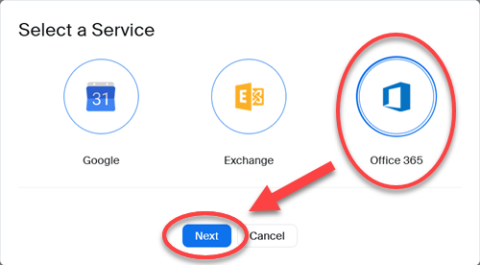
On the Select a Service screen, choose Microsoft 365, then click Next.
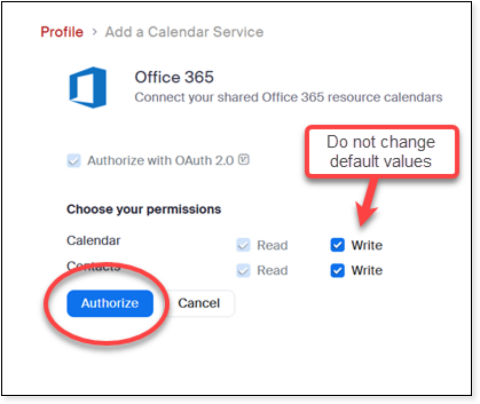
This will open your Zoom profile’s Add a Calendar Service panel in a web browser. Under Choose your permissions, leave the default settings checked, then click Authorize.
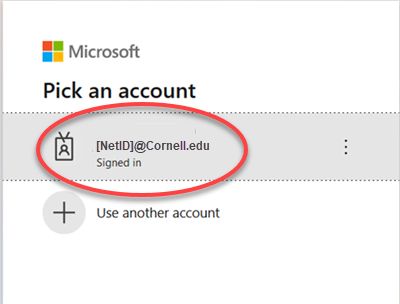
On the Pick an account screen, choose your Cornell NetID account.
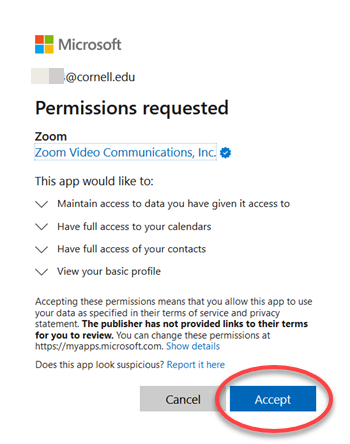
On the Permissions requested screen, click Accept.
- Sign in and authenticate with Two-Step Login if requested.
Comments?
To share feedback about this page or request support, log in with your NetID