Fraud Detection Warnings on Email Messages
This article applies to: Microsoft Outlook
Overview
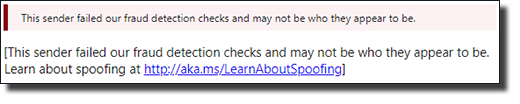

You may have seen warnings on certain email messages, stating that the message’s validity could not be verified. The examples shown above are two such warnings; different email systems use different wording, but the intent is the same. The warning does not mean that the message is definitely unsafe, but you should verify that you recognize the sender before trusting the content and/or links in the message. Validate the accuracy of the sender’s address and check with the sender (using another method, like text or telephone) that the message is actually from them.
These warnings are added to incoming messages by the email system where you read your messages or by systems delivering your messages; they are not part of the original message. They are not added by the e-list software sending the message.
These warnings are most often applied to mass mailings and messages sent through e-lists and groups.
What You Can Do
Notify the Sender that This is Happening
- If the message came through a Cornell e-list ending in @lists.cornell.edu, write to elistname-l-manager@lists.cornell.edu and describe what happened.
- If the message came through a Cornell e-list ending in one of the other @domains, write to owner-elistname-l@cornell.edu and describe what happened. (For example,
owner-bigredbobsled-l@cornell.edu) - If the message came from a non-Cornell e-list, notify the list’s owner. It is not in Cornell’s power to “fix” this for externally-hosted lists.
- If the message came from a mass mailing, notify the sender. We have some suggestions for people at Cornell sending Official Mailings via Third-Party Senders.
Allow These Messages Through
You can also teach your email app to allow messages from senders through without applying the warning.
Outlook on the Web
- Click the gear icon in the red header.
- Under Your app settings, click Mail.
- In the left column, under Accounts, click Block or Allow.
- Under Safe Senders and Recipients, enter the domain (not the full address). For example,
list.cornell.eduorbulk.mail.cornell.edu - Click the plus sign icon to the right of what you just typed.
- Click Save at the top of the browser.
Outlook for Windows
- Right-click the message listed in your Inbox or other folder.
- From the menu that appears, select Junk then Never Block this Sender’s Domain.
Do not select Never Block this Group or Mailing List; that choice doesn’t work well with our list software.
Outlook for Mac
This feature is not available. Use Outlook on the web to adjust this setting.
Comments?
To share feedback about this page or request support, log in with your NetID