Authorize Your IP Address for Media3
Are you trying to connect to services on a Media3 virtual machine? Are you working remotely or not currently connected to a CU network? You need to authorize your IP address for use with Media3.
This article applies to: Media3 Managed Web Hosting
Authorize Your Current IP Address
- Connect to the Media3 Dashboard. Enter your NetID and password to login.
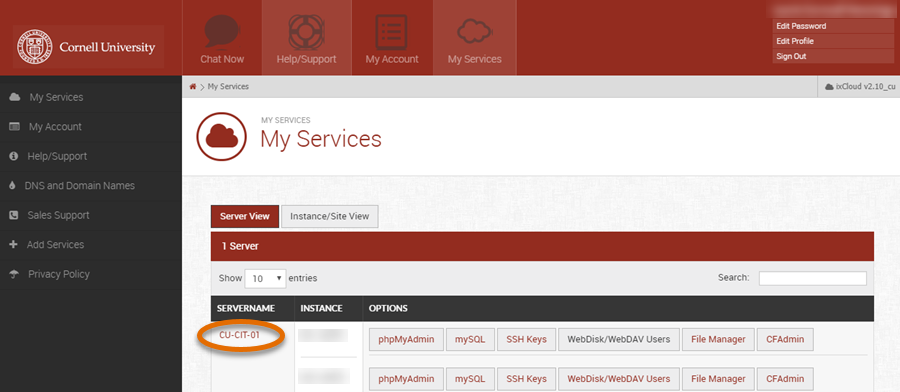
- Under My Services find the server you want.
- Under Server Name, select the name of your server.

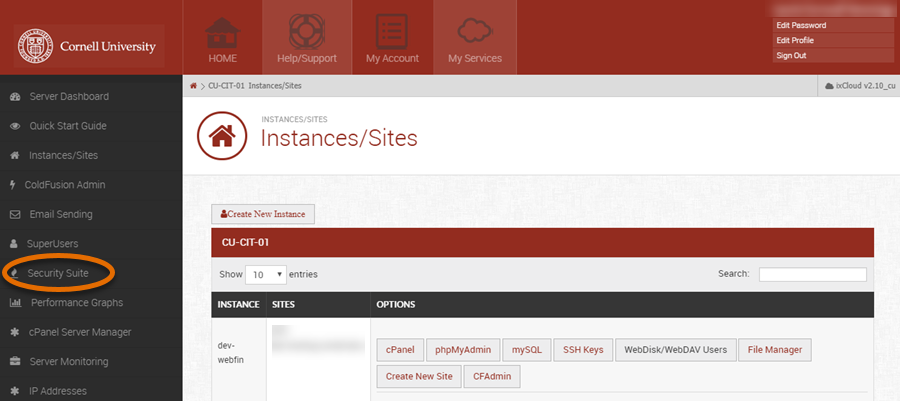
- Select Security Services.

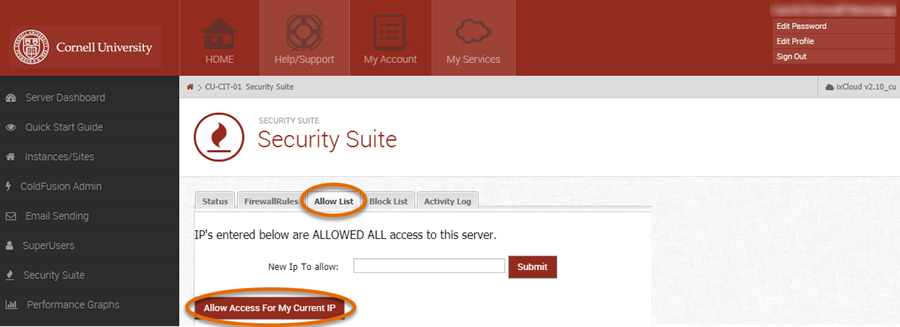
- Select Allow List.
- Select Allow Firewall Access For My Current IP.

- You will see a confirmation that this operation was successful.
- You can now access other dashboard/CPanel/WHM pages that may be network restricted. This will also allow you access the WebDAV port TCP/2078.
Troubleshooting Tips
You are working remotely. Everything was fine, but now it's not working anymore.
Remote users, especially on cell or residential connections, may switch IP addresses unpredictably. Reauthorize your current IP address by following these instructions again.
You do not see the Allow Firewall Access button.
You may be attempting to connect to a Confidential Data Security Tier machine. Due to security restrictions, you cannot open up the firewall on this machine yourself. Submit a help request to Media3 through the web interface.
You will not see the Allow Firewall Access button if you are already on a Cornell campus network. Access from all CU networks is already allowed.

Comments?
To share feedback about this page or request support, log in with your NetID