
Use Zoom Reports
The Reports section of the Zoom web portal provides account owners and admins with account, meeting, and webinar statistics, including meeting attendance and attendance duration.
This article applies to: Zoom
Run an Attendance Report
- Log in to the Cornell Zoom website.
- Click your profile picture in the upper right of the screen.
- Select .
- Click on the sidebar navigation menu.
- Under the Usage Reports tab, click .
- Select either or
You will see a list of all the meetings you hosted for the selected date range.
Use the date range tool at the top of the page to specify larger date ranges (up to a maximum of one month) or search a specific date range. Zoom Reports are retained for one year. Reports older than a year cannot be recovered.
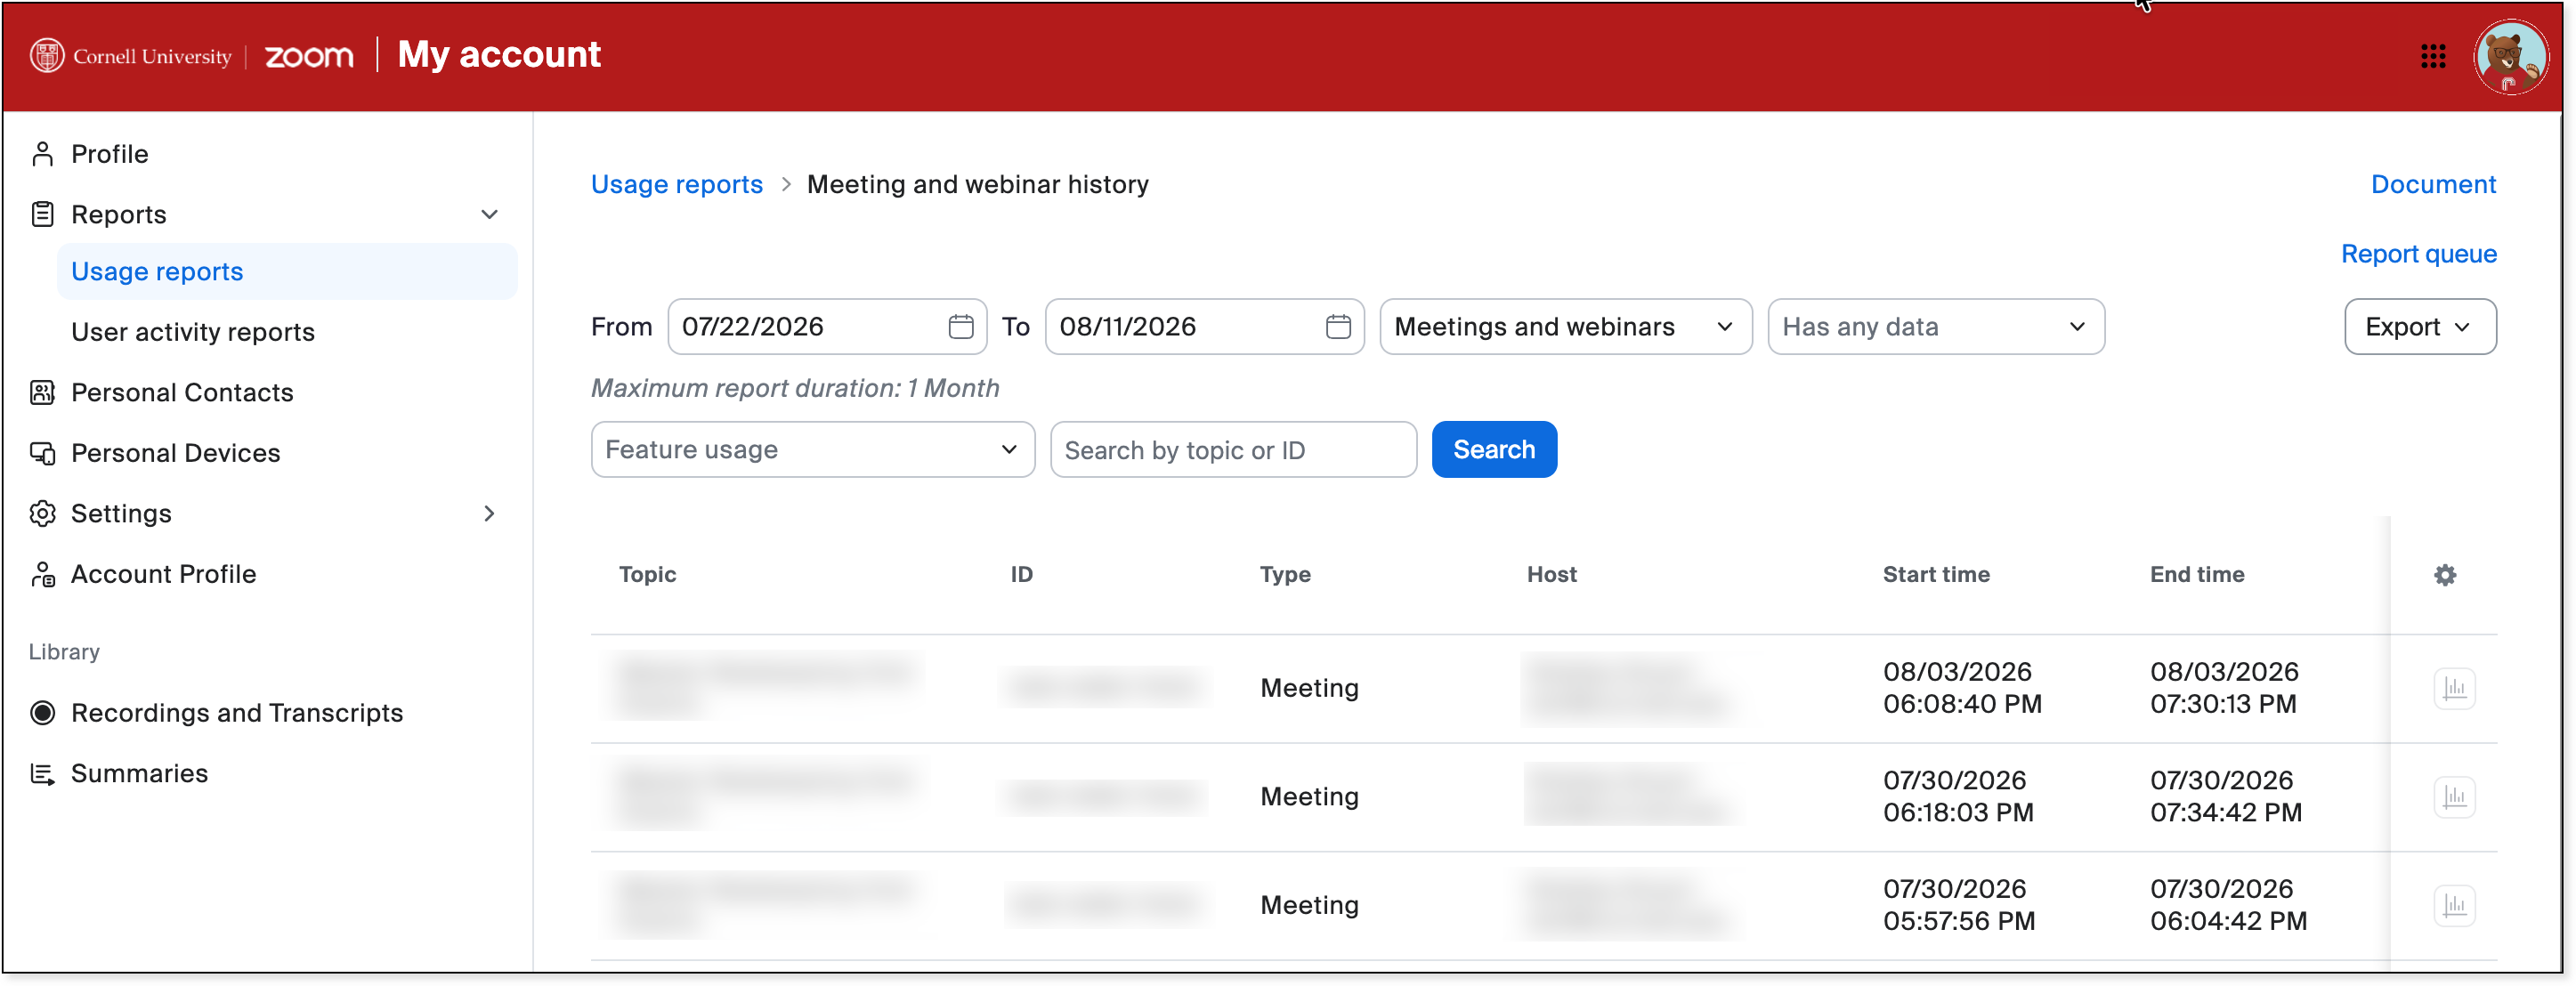
From this page take the following steps to see a meeting’s attendees:
- Locate the meeting you want to view attendance for.
- Scroll to the right to find the Participants column.
- Click the Participants number for the desired meeting. A Meeting Participants pop-up window will open displaying the meeting participant details.
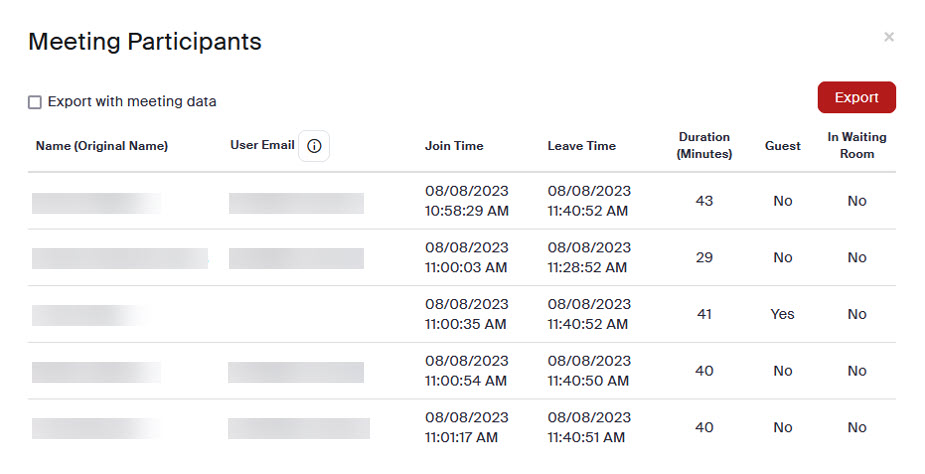
The Meeting Participants report will include:
- Name: The name of each participant (for Guests, this is the name entered by the attendee when they join the meeting). If attendees change their name during the meeting, this change will not be reflected.
- User Email: This will only be visible if the attendee is authenticated to the same Cornell Zoom instance. Zoom privacy hides e-mails for external attendees. For more information and exceptions, see Zoom has an FAQ on reporting changes.
- Join Time: When the attendee joined the meeting.
- Leave Time: When the attendee left the meeting.
- Duration: How long the attendee was in the meeting.
- Guest: Whether the attendee was a Guest.
- In Waiting Room: If your meeting included a waiting room, you will see a second entry for any attendee that was held in a waiting room and later admitted. If they were admitted to the meeting, then there will also be a separate report for their actual time in the meeting. If there is a “Yes” in the In Waiting Room column, it means that attendee’s record is for the unique instance that they joined and were in the waiting room. There may be further entries for that attendee on the report if they left and rejoined. See below for more information.
The Meeting Participants pop-up window also includes an button that will save the detail to a CSV file. There is an optional checkbox to which includes the meeting data (Meeting ID, Topic, Duration, Start/End Time) in the report.
Other Report Options
There are two tabs under the Reports option.
- : For accessing reports on usage, meetings, and webinars if applicable (see above).
- : Only includes info for “Reported Participants,” allowing you to view meeting or webinar participants that you’ve reported to Zoom.
More information can be found in Zoom’s article for getting started with Zoom reporting. Please note that many of the reports and features described in that article are admin-only, and not available to most Zoom users.
Comments?
To share feedback about this page or request support, log in with your NetID