Manage Your Appspace Library
This article applies to: CUView Digital Signs
In Appspace, content you want to display on your digital sign is stored in your Library. Each unit or department has its own library, which only users from that particular unit can access.
To open the Library, starting at the Appspace dashboard, either:
- click the Library icon in the left-side menu; or
- click the Go to Library link in the Content pane.
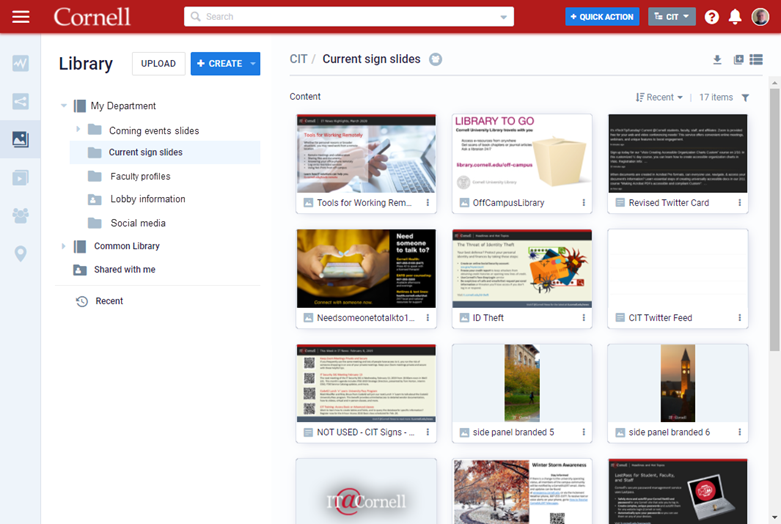
The library is visually divided into two parts. On the left, it shows the current unit’s folders. Appspace folders behave like folders on a personal computer, holding and organizing content files (images, audio, video, or Appspace content cards).
On the right, the library shows the items contained in the selected folder. By default, the library shows items in Grid view, displaying a thumbnail preview of each item.

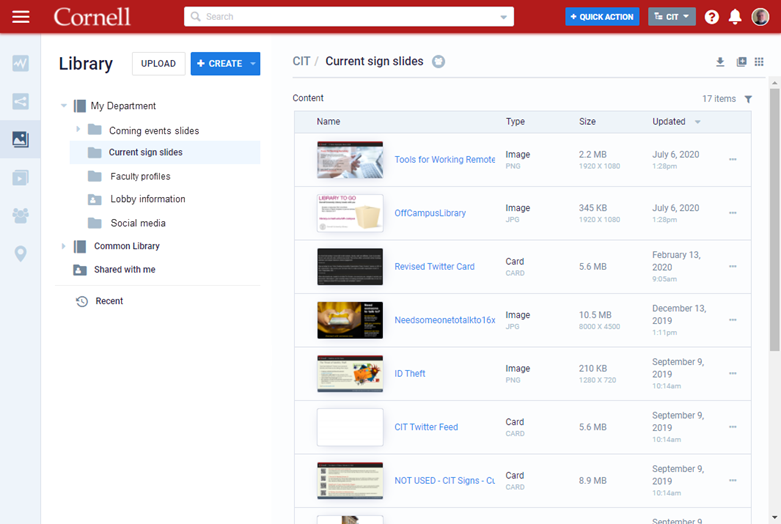
Click the List View icon at the top right of the library to display your content items in the form of a list.

In List view, click the heading of any column to sort library contents by that category. For example, click the Name heading to sort your items alphabetically by their names, or click Upload Date to sort items chronologically by when they were added to the Appspace library.
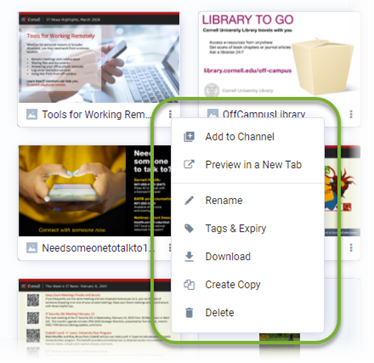
In either view, open a content item by clicking its name. Also, click the More menu (three dots) to open a menu of common useful actions.
In Grid view, you can also hover your cursor over an item to view key details about the item, such as its size, file type, date uploaded, and dimension in pixels.
Creating and Deleting Folders and Subfolders
To create a new folder or subfolder:
- Select either your unit’s name or an existing folder inside which the new folder will be located.
- Click the Add Folder button (a black circle with a white plus sign).
- A new folder is created, with Enter a New Name highlighted. Type a name for the folder (which will replace “Enter a New Name”) then press Enter.
To remove an existing folder:
- Select the folder you would like to remove.
- Click the Delete Folder button (black trash can).
- A dialogue box confirms that you want to proceed. Click OK to finish deleting the folder.
Filtering Which Content Is Visible
Use the small triangular arrow to the left of a folder’s name to expand and collapse any subfolders. Then select a subfolder to show its content.
Filtering will let you show certain categories of content; this may be useful for accounts with a large quantity of items, to narrow down the items shown by particular criteria. Click Filters to expand the dropdown lists and filter by content Type, Usage, Age, or Expire by date.
Then specify by any of these categories:
- The Type can be images, videos, PDFs, audio, etc.
- Usage specifies whether an item is Allocated (that is, used in a channel) or Unallocated.
- Age limits the selection according to a range of time periods (e.g. less than a week, less than a month, etc.)
- Expire by limits the selection to content with an expiration date in This week, This month, or a Custom range you specify. If you select Custom, click the Date field and select an expiration date from the pop-up calendar.
- Click the Tags bar to narrow the selection of content according to tags you have assigned to content items. Click one or more of the tags shown in the Tags area to select that tag; click again to deselect it. To clear your tag selections, click reset.
Moving Content Between Folders
To move content between folders in your library:
- Choose the folder where the content you wish to move is located.
- Select items you want to move:
- In Stack View (or grid view), click the item’s thumbnail image to select it. To select all items in a folder, check the Select all checkbox.
- In List View, check the box at the far left end of the item listing. To select all items in a folder, check the box in the heading of the checkbox column.
- Drag the selected item or items onto the destination folder on the left side of the screen.

Comments?
To share feedback about this page or request support, log in with your NetID