Connect to Ethernet with Access Net (Mac OS)
In order to use the ethernet in your room, you need to register your computer before you can connect.
This article applies to: Wired Network
Step 1: Disconnect VPN and Turn Off WiFi
- Open the "Cisco Secure Client" application and click the disconnect button if you are connected.
- Open the System Settings panel and select .
- Turn off Wi-Fi by clicking on the toggle.
Step 2: Plug in the Network Cable
Plug the network cable into a docking station, USB network dongle, or an integrated network port on the computer.
If you are unable to identify a port to plug your network cable into, please contact the IT Service Desk.
Step 3: Register the Device
A registration page should open up automatically. If it doesn't, please click Cornell Network to connect.
Click on . You will likely be asked to log in.
If you encounter a "Stale Request" error after logging in, disconnect the cable, close your browser entirely, reconnect the cable, then try again.
On the next page enter a description for your computer (for example, "work laptop").
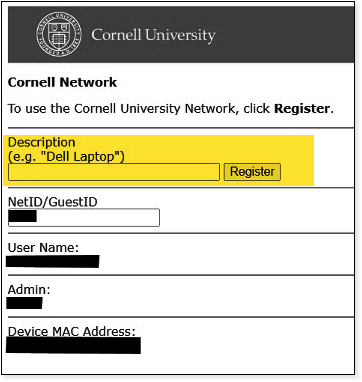
- Click .
Step 4: Confirmation
You should see a message confirming successful registration.
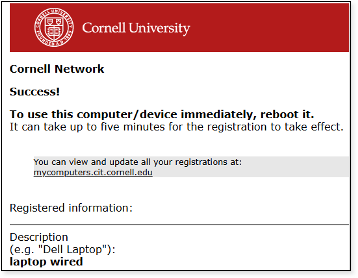
The connection should start working within 5 minutes. You can also force the computer to reconnect immediately by doing one of the following:
- Restart the computer.
- Disconnect and reconnect the network cable.
Confirm Your Wired Connection is Working
- Open System Settings and select .
USB 10/100/1000 LAN will show a green dot to indicate it has connected to the Ethernet.
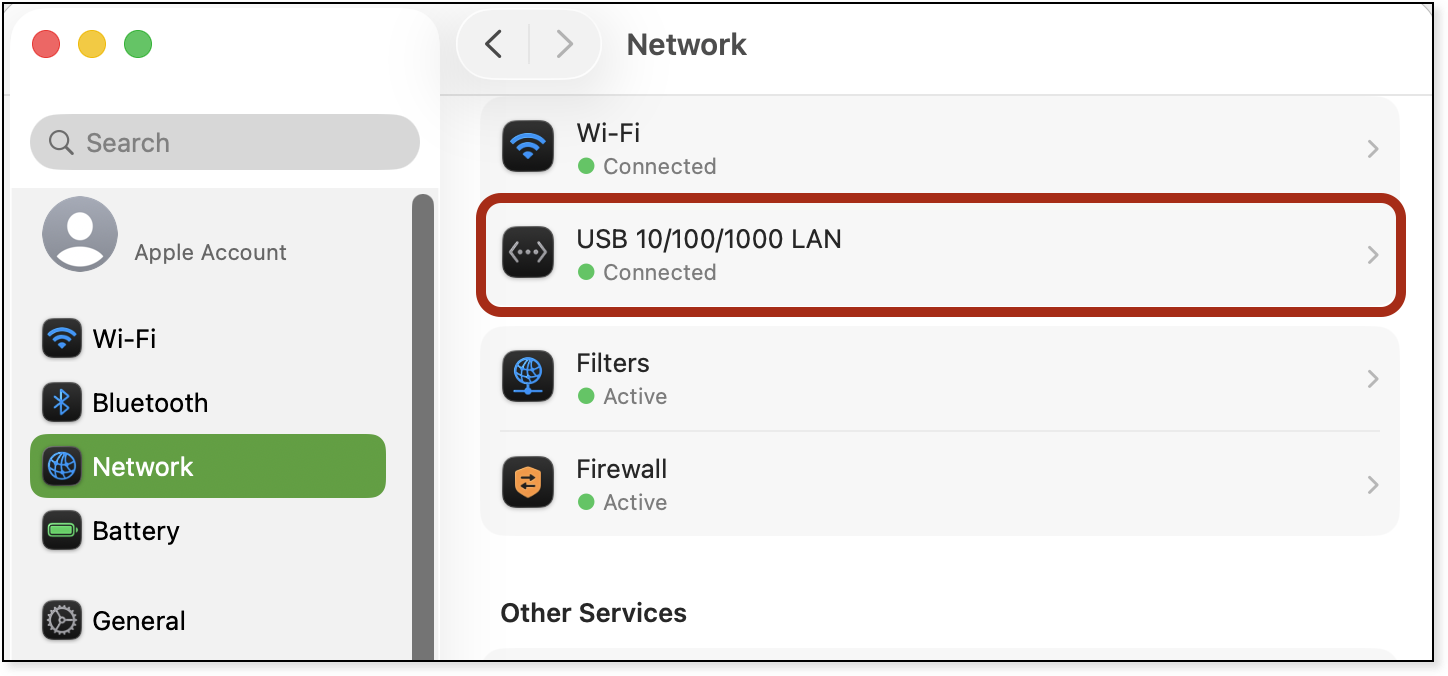
If you see that symbol, you should now be connected via the wired network!
Set the Ethernet Connection As Default (Optional)
To set your device so that it chooses Ethernet by default (instead of Wi-Fi):
- Open System Settings and select .
Click the three dots in the lower right corner and choose
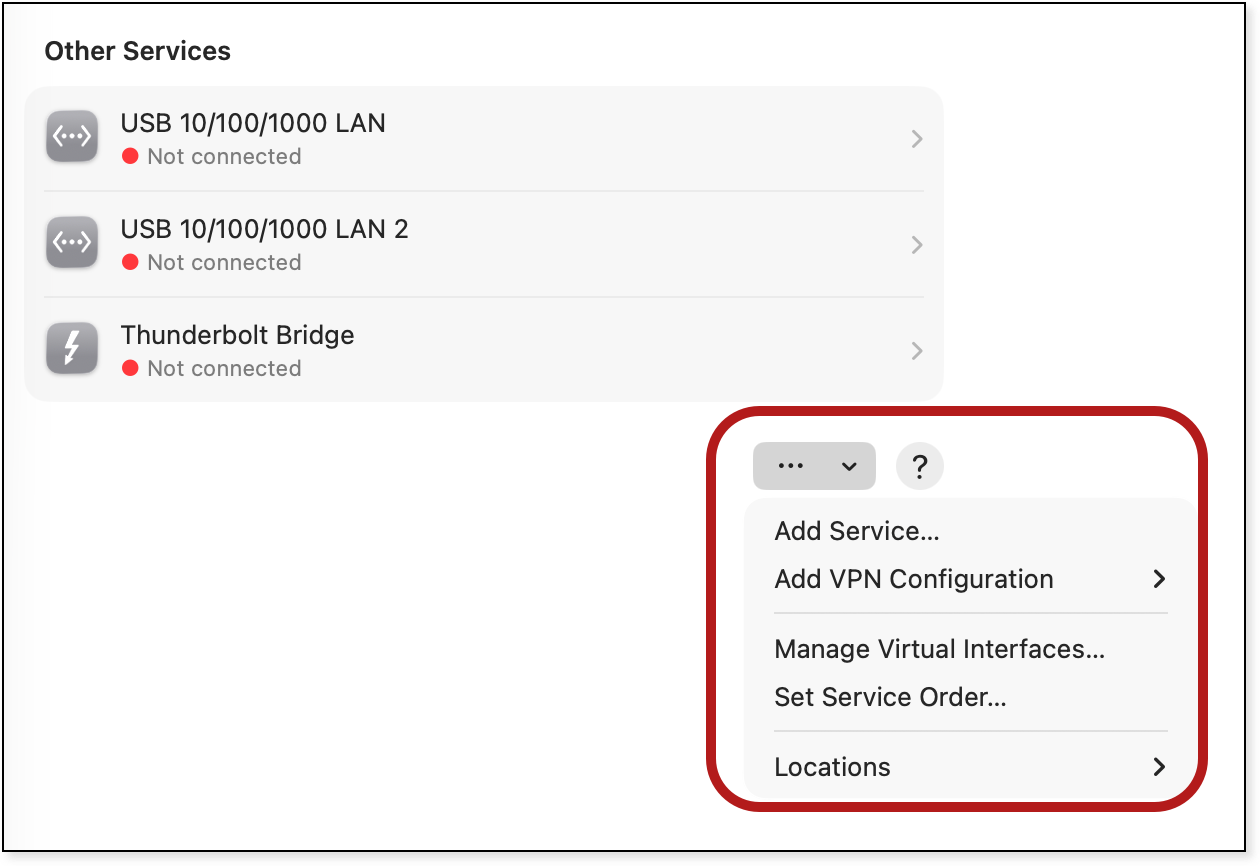
- Drag the Wi-Fi list item below USB 10/100/1000 LAN.
- Click
If you encounter problems with your connection, please contact the IT Service Desk.
Comments?
To share feedback about this page or request support, log in with your NetID