Use a GuestID with a VPN
GuestID VPN (GID VPN) is a remote-access VPN created exclusively for GuestID users. Unlike CU VPN, which uses Cisco technology, GID VPN uses VPN technology from Fortinet, specifically the FortiClient remote access VPN software.
Security Liaisons and TSPs interested in deploying a GuestID VPN should contact the IT Security Office (itsecurity@cornell.edu). Individuals with GuestIDs who have questions or need support using the GuestID VPN service should contact their sponsor for more information.
Download, Install, and Configure the GuestID VPN Software
- Download the OS-appropriate FortiClient software from https://downloads.cornell.edu/vpn/GIDVPN/index.html (GuestID users may need to click on the blue “Cornell NetID” bar to get to the authentication prompt).
- If you're upgrading from a previous version of FortiClient, you must uninstall it first.
- Run the installer using administrative access on your machine.
- Disconnect from CU VPN or any other VPN connection you might have active.
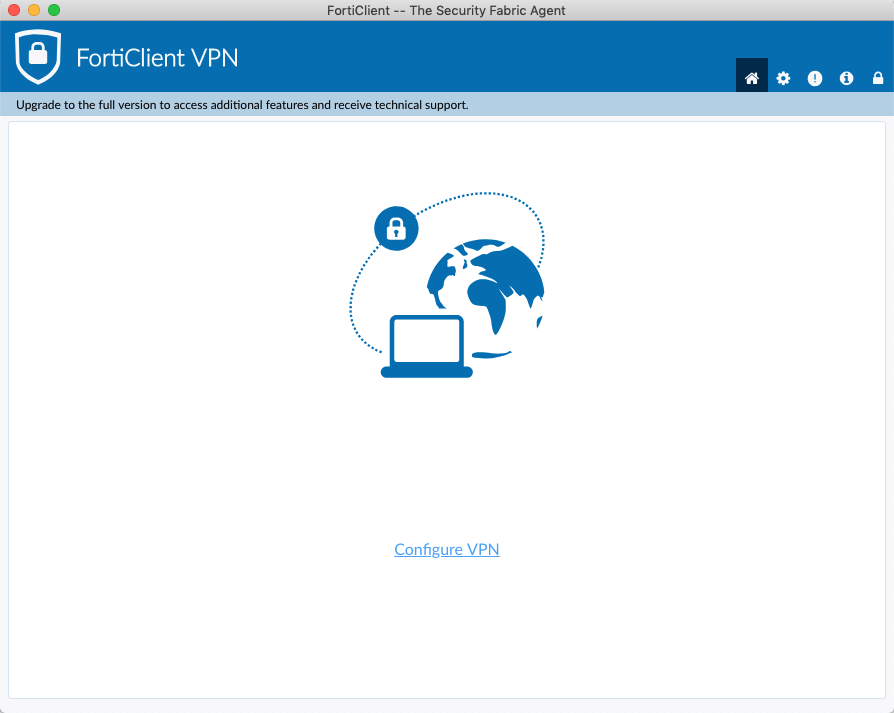
- Start the FortiClient software, accept the “no support” acknowledgment, and click , which is located low and centered in the window:

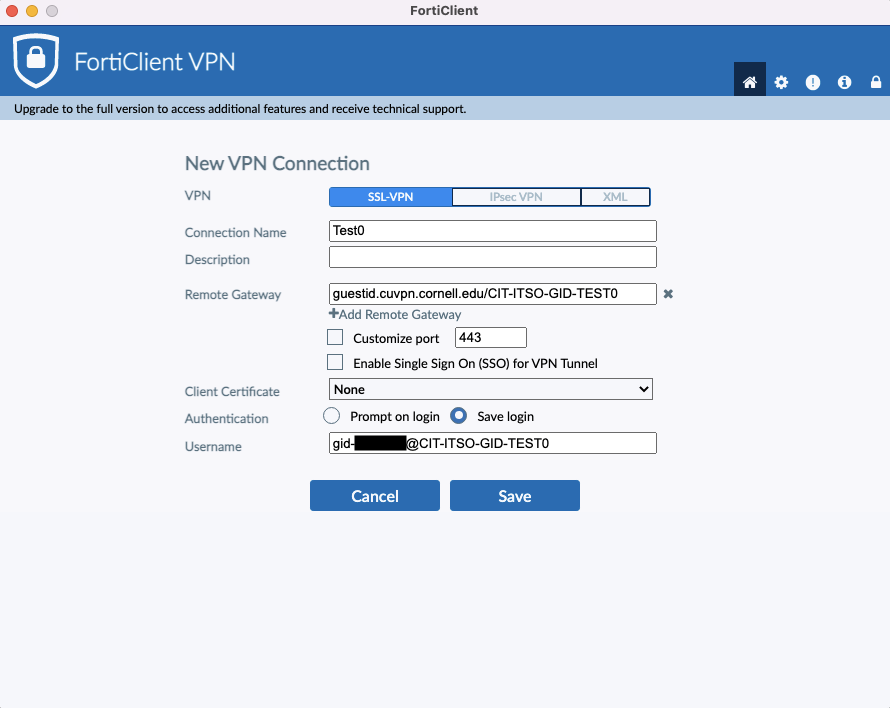
- Fill in the fields as follows:
- Connection Name - an arbitrary mnemonic label that the user will recognize;
- Remote Gateway - enter
guestid.cuvpn.cornell.edu/, then append the exact name of the AD group for your VPN access (available from your Cornell technical support provider) - Save login radio button - select .
- Username (which will appear after Save login has been selected) - the user's GuestID, “@”, and the exact name of the AD group as before.

- Click Save. The window will revert to displaying the Connection Name and Username configured, with a blank password dialogue box.
- Test to make sure that the connection functions.

Comments?
To share feedback about this page or request support, log in with your NetID