Understanding and Navigating Accounts and E-lists
This article applies only to the Simplelists e-list Service.
This article applies to: E-lists (Simplelists)
Simplelists Interface
Navigation options will move and change depending on the size of the browser window on your device. Here is how the menu options change depending on the window’s size.
| Navigation Option | Appearance in Full-Size Window | Appearance in Narrowed Window or on Mobile Device |

Upper right. | 
After selecting the hamburger menu icon in upper right of window, will appear in navigation menu on far left of the window. | |
Upper right. |
After selecting the hamburger menu icon in upper right of window, will appear in navigation menu on far left of the window. | |
| selection dropdown | Upper right. | Becomes gear icon |
| dropdown | 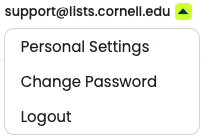
Upper right | 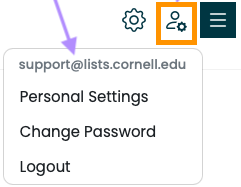
Becomes icon of a person with small gear. |
Note that the navigation menu may look different depending on your permissions. If you are in a narrow window and have selected the menu icon (![]() ) in the upper right of the window, it will turn into an and allow you to toggle the menu on/off.
) in the upper right of the window, it will turn into an and allow you to toggle the menu on/off.
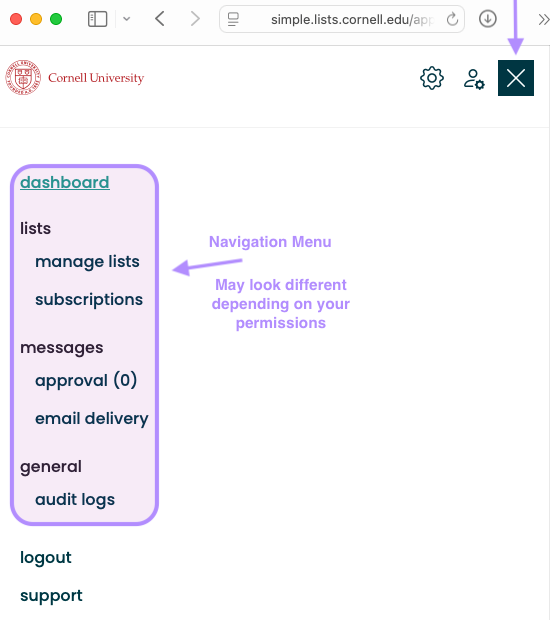
Select an E-List to Manage
Once logged in, the dropdown in the upper right corner of the window shows you which accounts you have administrative access to. If you're having difficulty finding this item, refer to the Simplelists interface section above.
The current account is the one which displays next to your login, and which is highlighted in gray when you click the dropdown arrow.
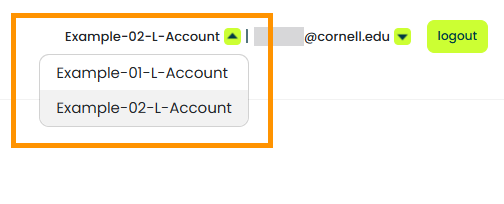
You can switch between accounts by selecting the one you want to work with from the dropdown.
Each account has one or more e-lists within it.
To select an e-list within an account:
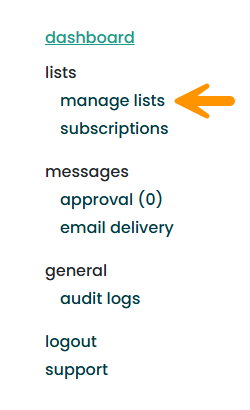
- Select from the menu on the left side of the screen.
Comments?
To share feedback about this page or request support, log in with your NetID