Share Privacy and Allowing Access
This article applies to: Shared File Services
Who can see my share?
All Cornell AD authenticated users can see that the share exists. See also Who can access data in my share?
Who can access data in my share?
After you receive your share, only the Administrative Active Directory User or Group specified on the Request Form have access into the share and are used to add ACL's for groups and users.
- “Include inheritable permissions from this object’s parent” is turned off for the top-level.
- “Domain administrators” as well as “Everyone” have no ACL's.
- SFS-Administrators have no access to your data, unless you add appropriate ACLs. Caveat: except as needed for legal, policy, or contractual compliance; in the case of the health or safety emergency; or for maintenance or technical security.
How can I allow others to access the share?
Before allowing access to the share, consider what data is being stored there and who should have access. It's the responsibility of the administrative contacts to maintain permissions to the share.
If you want to allow other users or groups to have access to the share, use the following procedure.
Note: This procedure should be completed using a Windows computer. You can complete the steps using a Mac, but the results are not consistent and it is not recommended.
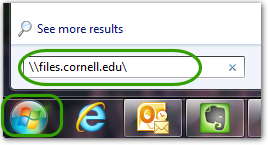
- Windows 7: Click the Start menu, and then in the Search box, enter \\files.cornell.edu, and then press .
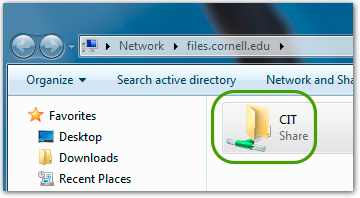
- Double-click your unit name.
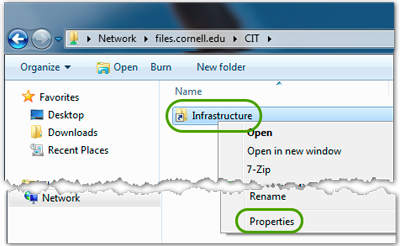
- Right-click your share, and then click .
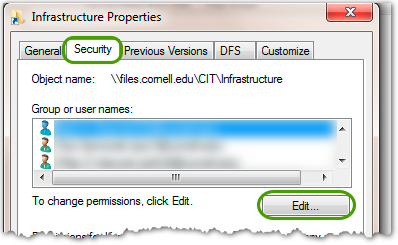
- Click , and then click .
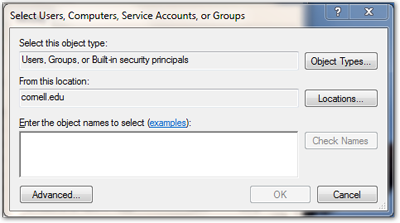
- Click . In the Enter object names to select box, type the NetID or Active Directory Group Name, and then click .
- Click to be sure you have typed the names correctly.
- Click to search for users or groups.
- You will see the user or group you added in the Group or user names box. Select the user or group and then in the Permissions for box, select the permissions you want to give them.
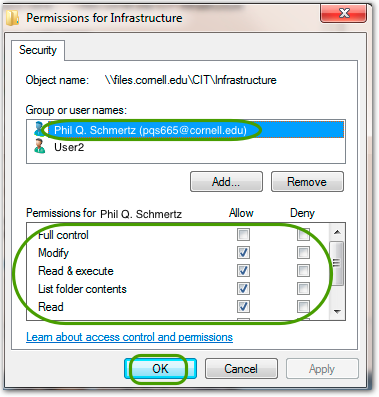 The default permissions are Read & Execute, List folder contents, and Read. If you want details about any permissions, select Learn about access control and permissions.
 - When you are finished, click , and then click again.
Comments?
To share feedback about this page or request support, log in with your NetID