Secure Windows Traffic with IPsec
Use IPsec to fulfill security requirements or enhance the security of your application. Add IP restrictions and TCP/UDP level encryption to applications which may not otherwise support it.
This article applies to: Managed Servers
What is IPsec?
Wikipedia: Internet Protocol Security (IPsec) is a protocol suite for securing Internet Protocol (IP) communications by authenticating and encrypting each IP packet of a communication session. IPsec also includes protocols for establishing mutual authentication between agents at the beginning of the session and negotiation of cryptographic keys to be used during the session.
Why use IPsec?
- To fulfill security requirements, or simply enhance the security of your application.
- It allows you to add IP restrictions, and TCP/UDP level encryption to applications which may not otherwise support it.
Prerequisites
- IP Protocol 50 (ESP) in/out
- IP Protocol 51 (AH) in/out
- UDP port 500 in/out
- Maybe TCP/UDP 88 (if you are authenticating)
- Maybe UDP 4500 (NAT)
Using Windows Firewall with Advanced Security, CornellAD Domain Attached
Complete all of the procedures on this page.
Link the Group Policy Object (GPO)
Identity Management has a policy called “CIT-IDM-MachineCertificateAutoEnrollment.” This enrolls any machine in the OU in the machine-based IPsec cert automatically.
- Link the Group Policy Object (GPO) to any OU where you will be using IPsec. All ServerFarm machines should have this policy linked already.
- Make sure the policy is applied on your servers. Run GPUpdate if necessary. Note: The default refresh of group policy is 90 minutes.
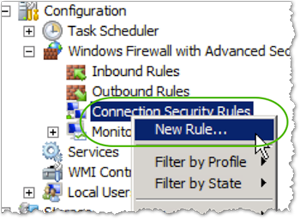
Create a Connection Security Rule on the Server
- Log onto the server.
- Open Windows Firewall with Advanced Security.
- Right-click Connection Security Rules and then click New Rule.
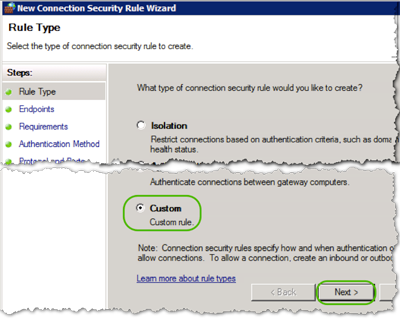
- Select Custom, and then click .
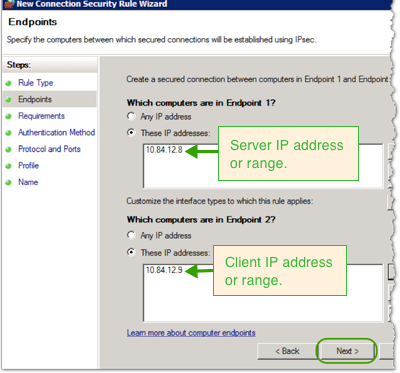
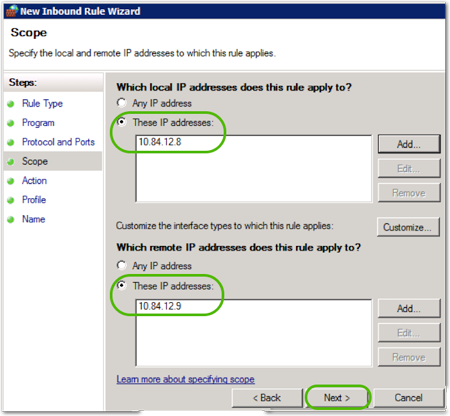
- In the Endpoints window, do the following:
- Which Computers are Endpoint 1 box, enter the server(s) IP address or range.
- In the Which Computers are Endpoint 2 box, enter the client(s) IP address or range.
- Click .
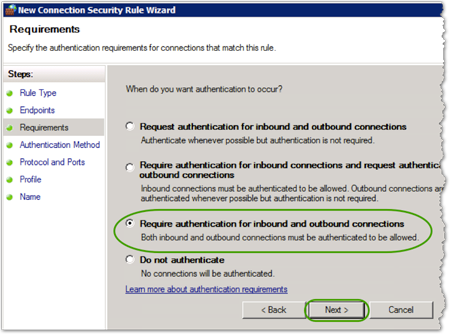
- Select Require authentication for inbound and outbound connections, and then click .
- In the Authentication Method box, select Advanced, and then click .

- In First Authentication Method, click .
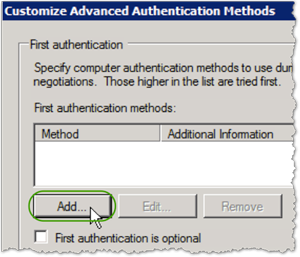
- In Add First Authentication Method, select Computer certificate from this certificate authority and then do the following:
- Signing algorithm : (default)
- Certificate store type: (default)
- Click and select the Issuing CA.
- Click .


- In Customize Advanced Authentication Methods, click .
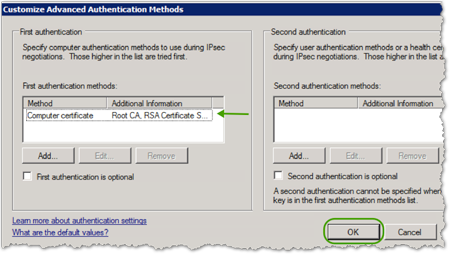
- You'll see the New Connection Security Rule Wizard: Authentication Method window again, click .
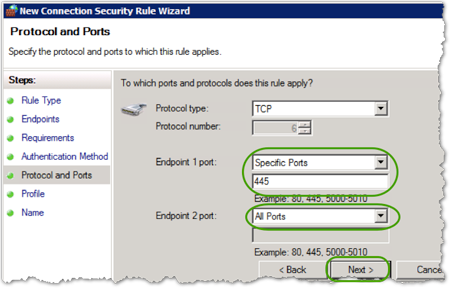
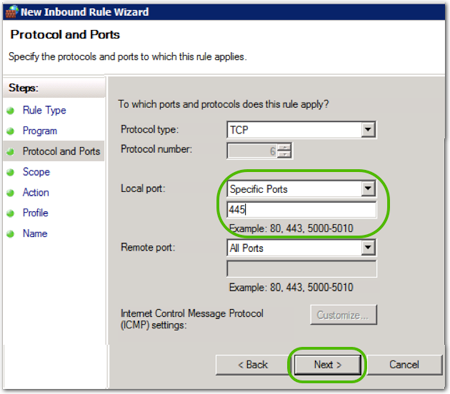
- In the To which ports and protocols does this rule apply box, select the ports/protocols for your service (we will use SMB, TCP 445 for this example), and then click .
Since Endpoint 1 is the server, only define the port on Endpoint 1. Leave it as All Ports for Endpoint 2.
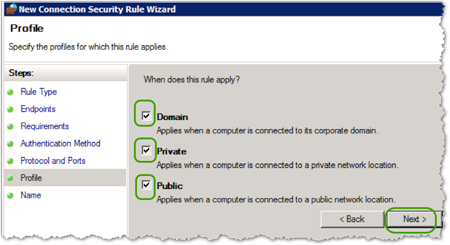
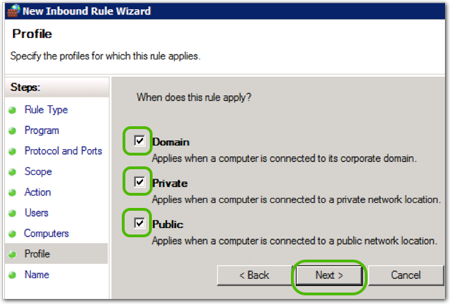
- In the When does this rule apply box, leave all the boxes checked, and then click .
- Name your rule, and then click .
Set Up the Client-side Security Association
- Log onto the client machine.
- Repeat the server side setup (steps 3-14 above in the Create a Connection Security Rule procedure) for the client. (Everything is identical, including the IP ranges and Endpoint 1 and 2).
- Test your connection to make sure it still works. Note: There might be a slight pause with your connection as the security association happens.
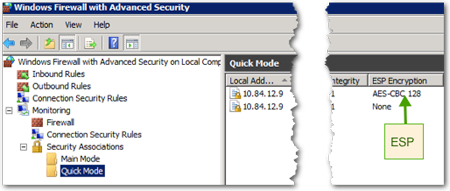
- In the Monitoring section of the Windows firewall, under Security Associations->Main Mode, you should now see an authentication between the two machines.
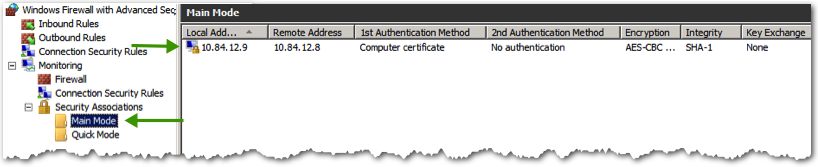
- Also note in the Security Associations, under Quick Mode, ESP Encryption is set to None. This means that there is authentication as to the validity of the sender, but the data itself is not being encrypted with IPSEC.

Set Up the Server-side Firewall Rule
- Log onto the server machine.
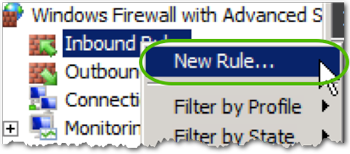
- Right-click Inbound Rules, and then click New Rule.
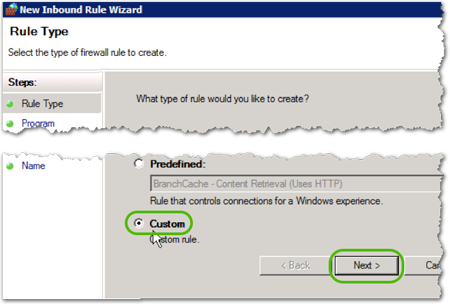
- Select Custom, and then click .
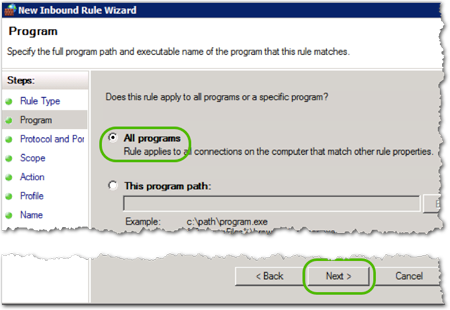
- Select All Programs, and then click .
- Select the serverside inbound port (in this example, SMB: TCP 445) and click .
- Select the ip addresses/ranges this rule applies to, and then click .
- Select Allow the connection if it is secure, and click .
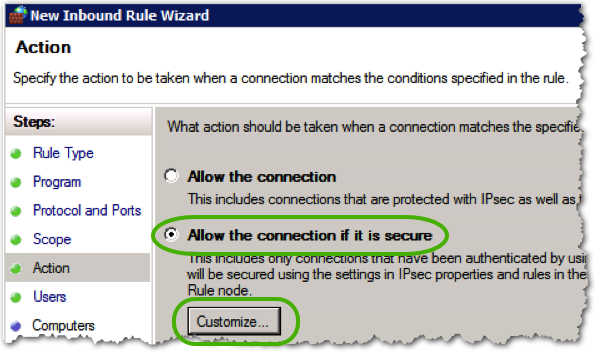
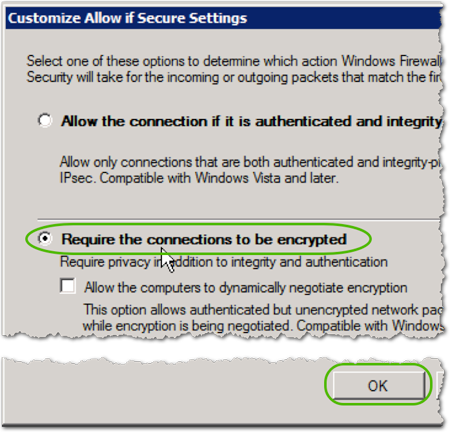
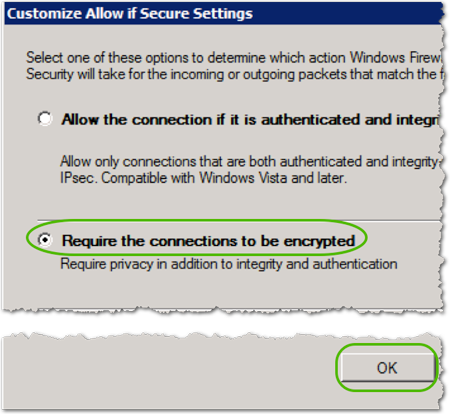
- Select Require the connections to be encrypted, and then click .
- In the Action box, click .
- In Users, click .
- In Computers, click .
- In Profile, leave all the profile boxes clicked and, then click .
- Name your rule and click .
Set Up the Client-side Firewall Rule
- Log onto the client machine.
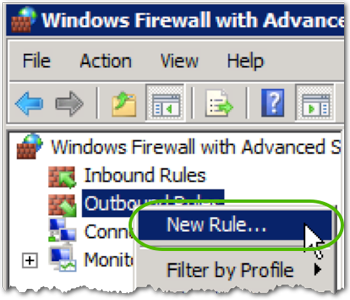
- Create a new firewall rule by selecting Outbound Rules-> New Rule…
- Select Custom and click .
- Select All programs and click .
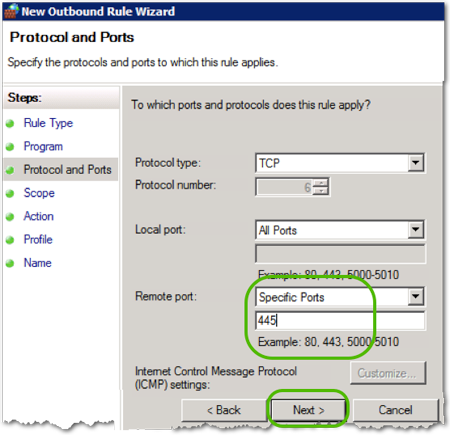
- Select the Remote port (in this example, SMB: TCP 445), and then click .
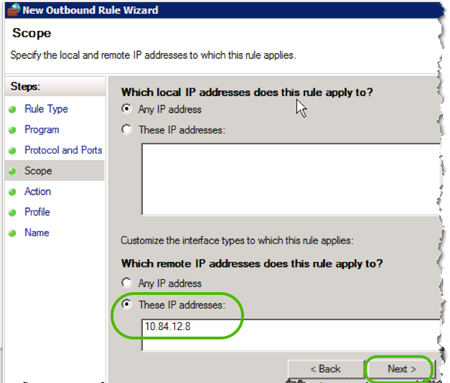
- Select the ip addresses/ranges this rule applies to, and then click .
- Select Allow the connection if it is secure, and click .
- Select Require the connections to be encrypted, and then click .
- In the Action box, click .
- In Computers, click .
- In Profile, leave all the profile boxes clicked, and then click .
- Name your rule, and then click .
Test the Final Connection
- On the client, test the connection to the server to confirm that it is working.
- In Windows Firewall -> Security Associations -> Quick Mode, you should see a new association with ESP Encryption. This is the encrypted communication.
Other Considerations
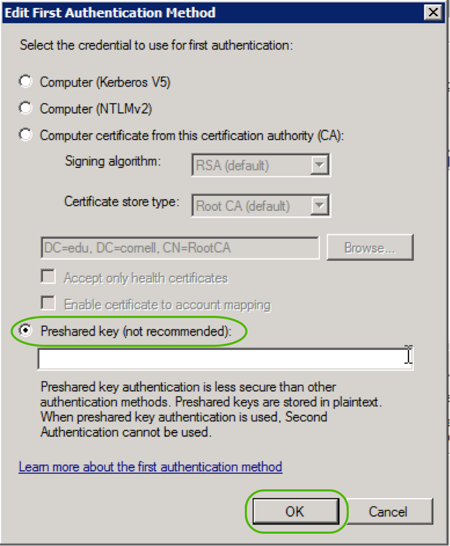
- For non-domain attached systems, use a preshared key. Preshared keys are stored in plaintext on the client/server, but it is still useful to secure traffic on the wire.
- Modify the connection security rule. Instead of the Computer Certificate, use the pre-shared key.
- Modify the connection security rule. Instead of the Computer Certificate, use the pre-shared key.
- For systems older than Vista, this is not supported. If possible, upgrade the system. For systems that can’t be upgraded, it is possible to use the IPsec policy on the system. However, there is only one policy per system, and it can’t be merged like firewall rules through group policy. It is fine as a one-off solution, but it isn’t suitable in an enterprise environment unless everyone is sharing the same settings.
- Linux/OS X can do IPSEC, but it requires 3rd party clients. It is simpler if you can limit the use to Windows.
- IPv6 (not yet available at Cornell) includes IPsec automatically; no configuration necessary. This has not been tested yet at Cornell.
- Windows Server 2012 and Windows 8 are not yet supported for managed servers in the server farm.
Comments?
To share feedback about this page or request support, log in with your NetID