Remove Members from a Group (CornellAD Group Management)
Individuals who have access to manage CornellAD groups can remove members via the web interface.
This article applies to: CU VPN , Group Management
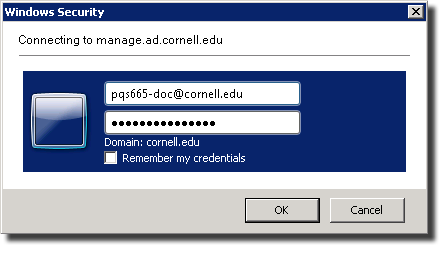
- Using a supported browser, connect to manage.ad.cornell.edu.
Note: If you are connecting from off-campus, you will need to have CU VPN installed and connected. - Log in using your NetID@cornell.edu or your DOCID@cornell.edu account. Use the ID that has privileges to manage the group.
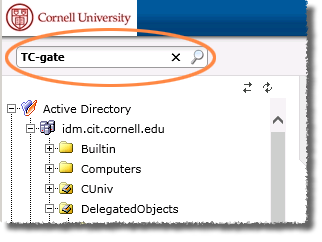
- Navigate to your group using the tree: Directory Management -> Active Directory -> cornell.edu -> DelegatedObjects. Or, if you know the group name, type it in the Quick Search box.
- From the list, select .
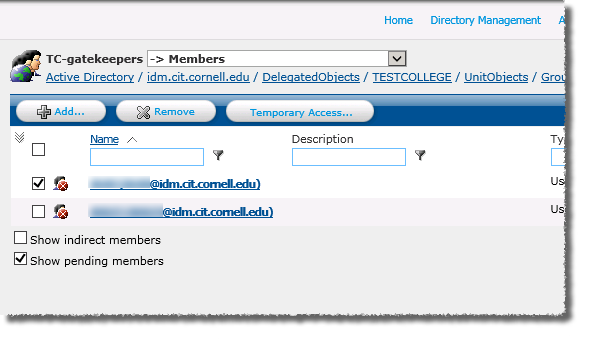
- Click to put checks next to the members you want to remove.
- Click . Note: If you don't see the button, check that you used the NetID or DOCID with the proper privileges to log in. If necessary, click and then log back in using the correct ID.
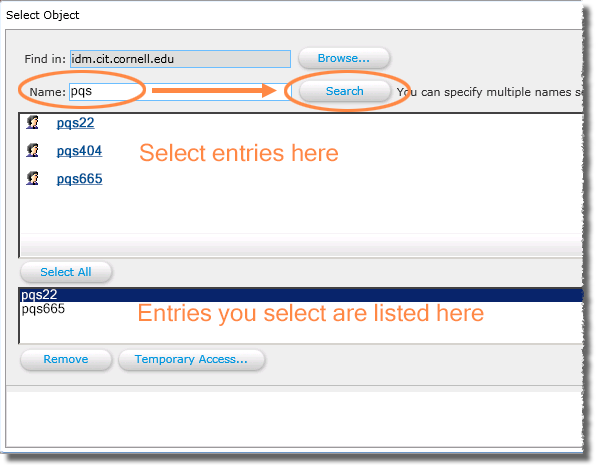
- Type the name or NetID (or group, holdingID, GuestID, TestID, or computer), then click . From the list, click each entry that you want to add to the group. Names you select are added to the list in the bottom half of the screen. After adding one account, you can search for another. Continue the process until all the accounts are added.
- Click .
Tip for Large Groups
For a group with many members, it may be cumbersome to locate the NetIDs you want to remove. In the Name box, enter the NetID and press Enter. You'll see a list of NetIDs in that group that matches your search string. Select the correct NetID, and then click . 
To see the entire list of group members again, clear the Name box, and press Enter.
Comments?
To share feedback about this page or request support, log in with your NetID